Re-executing failed test cases and merging outputs with Robot Framework

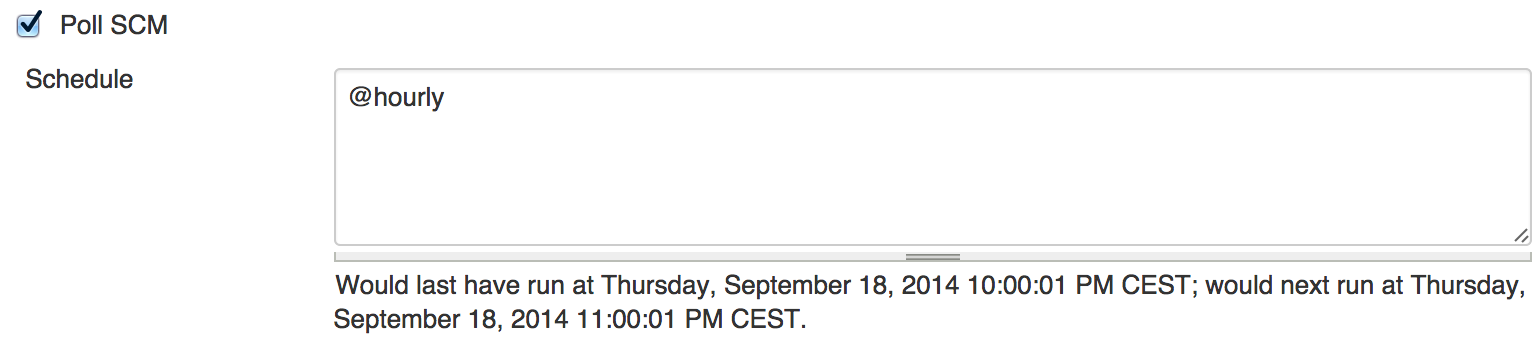
In a previous post, I discussed solving intermittent issues aka building more robust automated tests. A solution I did not mention is the simple “just give it another chance”. When you have big and long suites of automated tests (quite classic to have suites in the 1000’s and lasting hours when doing functional tests), then you might get a couple of tests randomly failing for unknown reasons. Why not just launching only those failed tests again? If they fail once more, you are hitting a real problem. If they succeed, you might have hit an intermittent problem and you might decide to just ignore it.

Re-executing failed tests (–rerunfailed) appeared in Robot Framework 2.8. And since version 2.8.4 a new option (–merge) was added to rebot to merge output from different runs. Like explained in the User Guide, those 2 options make a lot of sense when used together:

# first execute all tests
pybot --output original.xml tests 
# then re-execute failing
pybot --rerunfailed original.xml --output rerun.xml tests 
# finally merge results
rebot --merge original.xml rerun.xml

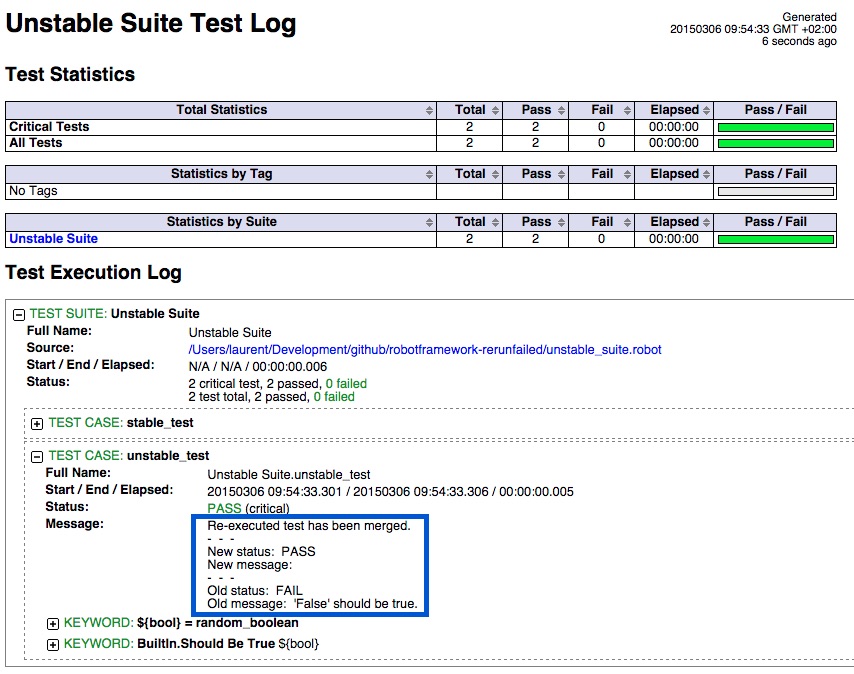
This will produce a single report where the second execution of the failed test is replacing the first execution. So every test appears once and for those executed twice, we see the first and second execution message:

modified

Here, I propose to go a little bit further and show how to use –rerunfailed and –merge while:

  • writing output files in an “output” folder instead of the execution one (use of –outputdir). This is quite a common practice to have the output files written in a custom folder but it makes the whole pybot call syntax a bit more complex.
  • giving access to log files from first and second executions via links displayed in the report (use of Metadata). Sometimes having the “new status” and “old status” (like in previous screenshot) is not enough and we want to have details on what went wrong in the execution, and having only the merged report is not enough.

To show this let’s use a simple unstable test:

*** Settings ***
Library  String

*** Test Cases ***
stable_test
    should be true  ${True}

unstable_test
    ${bool} =  random_boolean
    should be true  ${bool}
    
*** Keywords ***
random_boolean
    ${nb_string} =  generate random string  1  [NUMBERS]
    ${nb_int} =  convert to integer  ${nb_string}
    Run keyword and return  evaluate  (${nb_int} % 2) == 0

The unstable_test will fail 50% of times and the stable test will always succeed.

And so, here is the script I propose to launch the suite:

# clean previous output files
rm -f output/output.xml
rm -f output/rerun.xml
rm -f output/first_run_log.html
rm -f output/second_run_log.html
 
echo
echo "#######################################"
echo "# Running portfolio a first time      #"
echo "#######################################"
echo
pybot --outputdir output $@
 
# we stop the script here if all the tests were OK
if [ $? -eq 0 ]; then
	echo "we don't run the tests again as everything was OK on first try"
	exit 0	
fi
# otherwise we go for another round with the failing tests
 
# we keep a copy of the first log file
cp output/log.html  output/first_run_log.html
 
# we launch the tests that failed
echo
echo "#######################################"
echo "# Running again the tests that failed #"
echo "#######################################"
echo
pybot --outputdir output --nostatusrc --rerunfailed output/output.xml --output rerun.xml $@
# Robot Framework generates file rerun.xml
 
# we keep a copy of the second log file
cp output/log.html  output/second_run_log.html
 
# Merging output files
echo
echo "########################"
echo "# Merging output files #"
echo "########################"
echo
rebot --nostatusrc --outputdir output --output output.xml --merge output/output.xml  output/rerun.xml
# Robot Framework generates a new output.xml

and here is an example of execution (case where unstable test fails once and then succeeds):

$ ./launch_test_and_rerun.sh unstable_suite.robot

#######################################
# Running portfolio a first time      #
#######################################

==========================================================
Unstable Suite
==========================================================
stable_test                                       | PASS |
----------------------------------------------------------
unstable_test                                     | FAIL |
'False' should be true.
----------------------------------------------------------
Unstable Suite                                    | FAIL |
2 critical tests, 1 passed, 1 failed
2 tests total, 1 passed, 1 failed
==========================================================
Output:  path/to/output/output.xml
Log:     path/to/output/log.html
Report:  path/to/output/report.html

#######################################
# Running again the tests that failed #
#######################################

==========================================================
Unstable Suite
==========================================================
unstable_test                                     | PASS |
----------------------------------------------------------
Unstable Suite                                    | PASS |
1 critical test, 1 passed, 0 failed
1 test total, 1 passed, 0 failed
==========================================================
Output:  path/to/output/rerun.xml
Log:     path/to/output/log.html
Report:  path/to/output/report.html

########################
# Merging output files #
########################

Output:  path/to/output/output.xml
Log:     path/to/output/log.html
Report:  path/to/output/report.html

So, the first part is done: we have a script that launch the suite twice if needed and put all the output in “output” folder. Now let’s update the “settings” section of our test to include links to first and second run logs:

*** Settings ***
Library   String
Metadata  Log of First Run   [first_run_log.html|first_run_log.html]
Metadata  Log of Second Run  [second_run_log.html|second_run_log.html]

 If we launch our script again, we will get a report with links to first and second run in the “summary information” section:

report

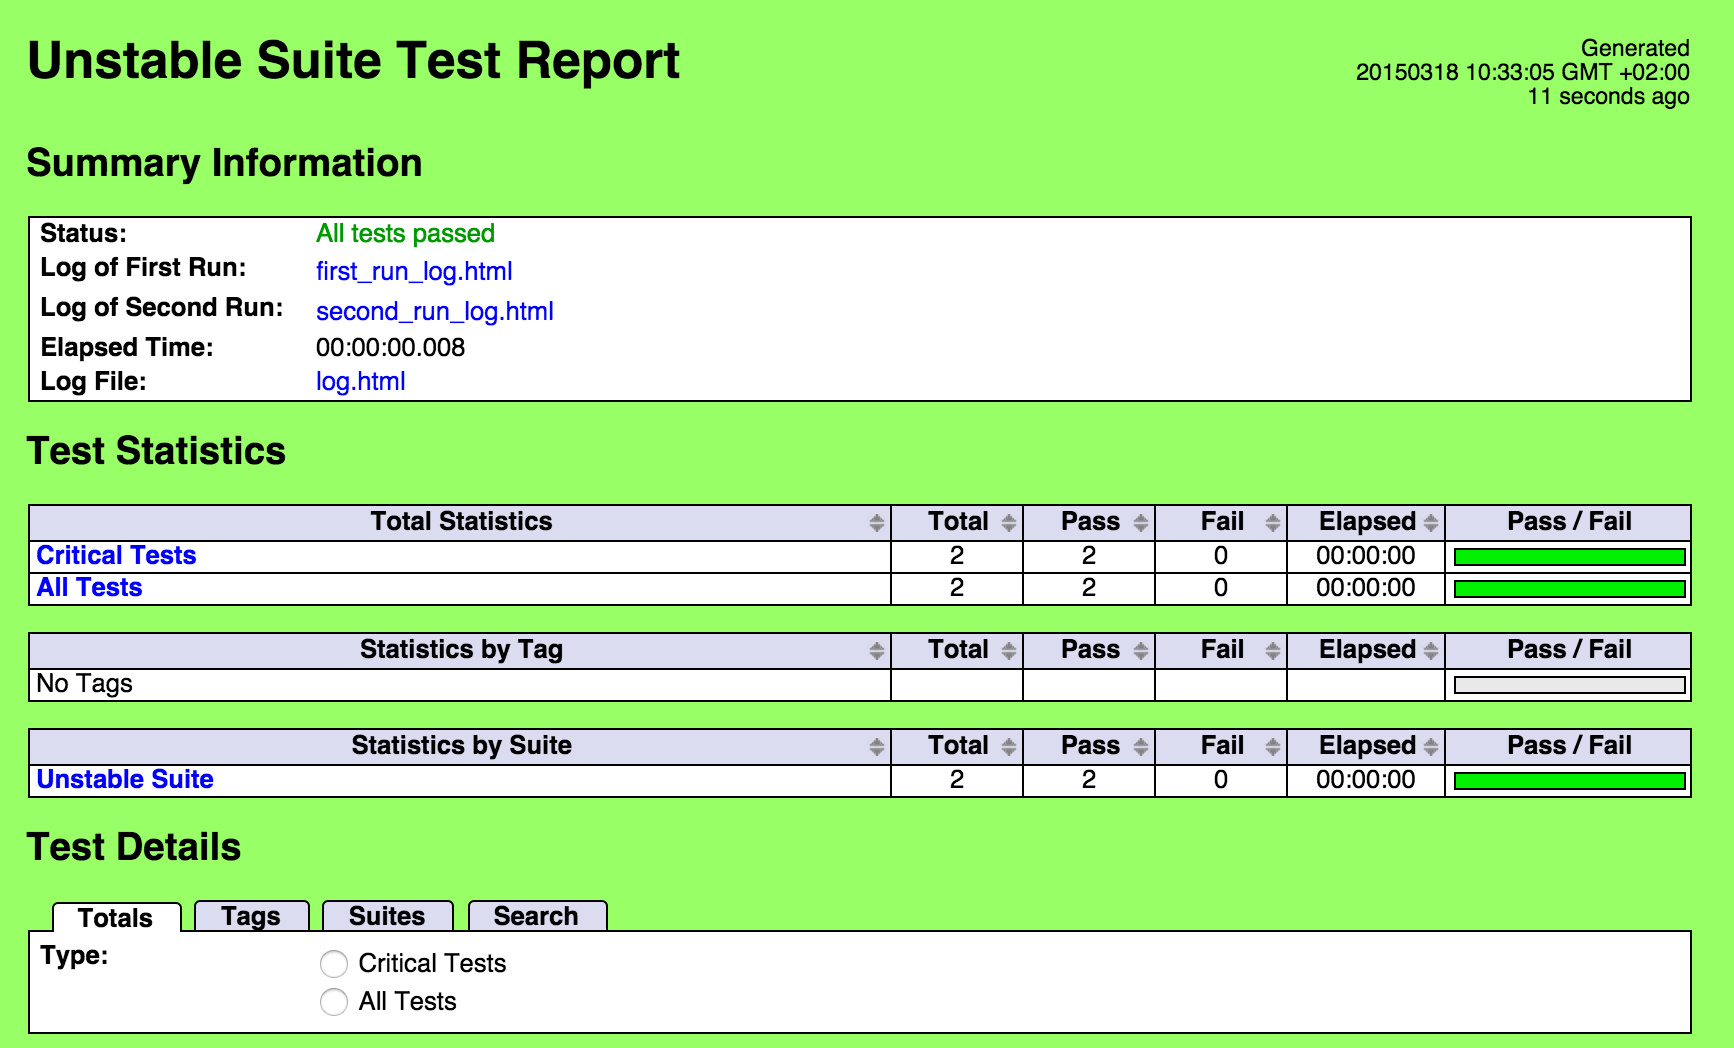
The script and the test can be found in a GitHub repository. Feel free to comment on that topic if you found out more tips on those Robot options.

Create Jenkins Job for Robot Framework

Once you have created your first tests in Robot Framework, next step is to include those tests in your Continuous Integration (CI) System. Here I will show the different steps to do so in Jenkins.

Let’s assume you have

jenkins_begin

First we create a new job to launch our Robot tests:

create_job

Once the job is created, we configure it.

  1. set up Source Code Management for the source code of the tests:jenkins_svn
  2. set up a first “Build Trigger” on the success of the job that builds the SUT:trigger_build
  3. set up a second “Build Trigger” on changes in the Source Code of the tests:trigger_scm
    This way your tests will be launched either if there is a new build of the SUT or if your tests have changed. Second trigger is relevant because some modifications in your tests may have broken some of them, and you don’t want to wait for the next build of the SUT to find it out. In other words, when a test fails in Jenkins, it is good to know if this is a consequence of a change in the SUT of a change in the tests (if both changed, analysis will be tricker).
  4. get the artefact from the project that build your SUT so that your SUT is available from your Jenkins’ workspace where the Robot tests will be run. To do so you can either use the Jenkins Copy Artifact Plugin or write a piece of Batch/Shell script.screenshot-copy-artefacts
  5. The comes the step in which Robot tests are going to be launched. For this you create a “Execute Shell” Build step that contains, at least:
    pybot path/to/my_tests/

    and all the –variable, –include, –exclude etc. that you use to customise you run.
    One noteworthy command line option in the context of a CI server is –NoStatusRC, which force Robot’s return code to zero even when there is test that fails. This way the status of the Jenkins build can be driven by Robot Jenkins Plugin like you will see in final step.build_robot

  6. Finally, to have a more granular settings of the results of the tests, and keep a copy of the report/log of the test executions located in the Jenkins Server, you can use Robot Framework Plugin. Once the plugin is installed, it will be available in the list of “Post Builds Actions”. A simple configuration would be like this:pluginand after a couple of builds, the project page would look like that:plugin_project_page

Once this basic setup is working, you will find out many options in Jenkins and Robot Framework to get more value out of it. To give just one example, once the test portfolio becomes large and/or long, you might find out that this is not efficient to launch the full regression suite at once when there is a change in the SUT or the tests’ code. A good strategy is to have 2 Jenkins job. The first one (“smoke tests”) is running only a portion of the whole suite that runs quickly (say 5/10 minutes for example):

pybot path/to/my_tests/ --include smoke --exclude not_ready

and the second job (“full tests”) launches all the tests:

pybot path/to/my_tests/ --exclude not_ready

but is launched only when smoke tests are run successfully: chain_builds

so if your SUT or your tests have some essential feature (covered in the smoke test) broken, you will save your machine a “full test”, and, more important, the team have a quicker feedback on the quality of the SUT build.


Robot Framework, Selenium, Jenkins, and XVFB

Until recently, my test cases written with Robot Framework were not driven by the GUI. Those tests were interacting with the SUT using many different ways: process library, database access, file system, REST requests etc. Those access usually don’t change too often during the lifetime of a product as they often become a contract for users/tools communicating with product (i.e. API). Whereas driving the SUT through the UI can be brittle and engage the team in a constant refactoring of the tests. This is summarized in the famous pyramid of tests. But, having no automated GUI tests, my pyramid was headless! So I decided to invest a bit in the topic.

From there I had the choice between :

  • writing tc with Robot using the Robot Framework Selenium 2 library
    pro: integrated with other existing Robot tc + easy to start
    con: library a bit behind the official one + selenium users are mostly not using this API
  • writing tc in Java using the Selenium 2 Java binding
    pro: up to date + large community of users
    con: another set of tools to write/launch/report test cases in addition to Robot

I took the easy path and went for the Robot Library. There is an excellent demo of the library which helps to start-up. Before digging into the tests of my SUT, I added another 2 steps:

  1. going a bit further in my knowledge of Chrome Developer Tool. There is an excellent online course by Code School. Those tools are soon becoming very useful when creating GUI driven test case. Note that, Firefox dev console seems to offer the same service, but somehow I feel more ease with Chrome ones.
  2. running a testing dojo with a group of peers. We used Jenkins as SUT (as I already did to perform some stress test trials) and it worked quite well although Jenkins does not seem to be the easiest web app to test as we had to use XPATH to locate element which can become obsolete quite fast.

I was then able to create my first tests on the SUT I am testing. Those were more easy as expected as all the element I had to address had unique IDs! The biggest obstacle is to chain actions without using the horrible sleep keyword (see Martin again). With the Robot Selenium library, the easiest way is to use (and abuse) the “wait until page contains element” keyword.

Last but not least, I needed to launch the tests using Jenkins (very easy and quite nice with the plugin) on a linux VM…. without a display! Here enters PhantomJS that is a headless browser supported by the Robot Selenium library. But somehow, my tests were randomly failing with it, so I gave it up and went back to Firefox. And here is the last character of this little story: xvfb. This display server sends the graphic to memory so no need to have a full/real display available. The install is not immediate but some shared their feedback on it so it is quite smooth after all.

So the current configuration  of my Robot Selenium tc in Jenkins is:

  • xvfb running on the VM on which tests are going sending display to :89
  • in Jenkins, in my Robot task, in “Build Environment / Set environment variable” I put “DISPLAY=:89”

And that’s it, tests are running OK on this VM. And on the top of that, when there is a failure in the tests, the Robot Selenium lib is able to perform a screenshot and save it to disk to ease analysis of the issue!