Some great online scientific educational resources

The web is a great place to find some educational resources about many scientific topics. Some authors are publishing videos of super high quality, both accurate and entertaining. Though browsing YouTube to find the great ones can be difficult (clickbaits are all around…). In this short post, I just wanted to share three of my favorite channels.

Crash Course

Crash course is a YouTube channel started by John and Hank Green with plenty of series. I really loved the Computer Science one! Carrie Anne Philbin is hosting it with a great expertise and enthousiasm. Watching all the episodes, you will have a quick history of the field of computers, a good view on the main parts of the architecture of processors and computers, and some information about the main application fields and current hot topic. If you like it as I did, you can then binge the AI crash course to discover AI/ML in a step-by-step and fun way.

Kurzgesagt – In a Nutshell

With close to 14 millions subscribers, Kurzgesagt is already super well-known! So in case you missed it so far, go watch their videos. The production is setting a super high standard! It has a very scientific angle and really tries to explain things as gradually as possible. You don’t need much background knowledge, yet they are able to teach you new things every time! Their ant videos are fascinating, the Fermi paradox ones are great as well, and of course, you can’t miss the Coronavirus one!

3Blue1Brown

A recent discovery for me, 3blue1brown by Grant Sanderson, is a bit more demanding in terms of initial scientific knowledge, in this case maths. I started with the Neural Network one as I was looking for some good explanation on the main principles. I was blown away by the quality of the video and the clarity of the explanation! I then watched The hardest problem on the hardest test and the Essence of calculus playlist and here again, astonishing work by Grant. This will make you love maths if you don’t already!

Comparison of Robot Framework and pytest for functional tests automation

Robot Framework and pytest are two popular test automation frameworks used in the Python community. At first glance, their usage seems to be different. Robot Framework is advertised as a “generic test automation framework for acceptance testing” and the first example of the home page is a login/password test written in a DSL that puts it in the black-box testing category. Whereas pytest home page shows a unit test of a Python method hence more white-box testing oriented.

So is the situation clear? On one side Robot for not-so-technical QA doing automation on the final product and on the other side pyTest for developers writing unit tests? Not so sure as pytest can be used for high-level functional test automation as well (“complex functional testing for applications” stated in pytest home page). So how do both framework compare for functional tests automation?

Let’s start by writing a minimal test in both frameworks. For our simple example, the SUT will be git and we will check the output of git version command called from the command line.

The test in pytest:

import subprocess
 
def test_command_line():
p = subprocess.Popen('git --version', shell=True, stdout=subprocess.PIPE)
p.wait()
assert p.stdout.read() == 'git version 2.15.2 (Apple Git-101.1)\n'

And its execution:

pytest test_with_pytest.py
======================================== test session starts ========================================
platform darwin -- Python 2.7.15, pytest-3.7.2, py-1.5.4, pluggy-0.7.1
rootdir: /Users/laurent/Development/tmp/pytest, inifile:
collected 1 item
 
test_with_pytest.py . [100%]
 
===================================== 1 passed in 0.02 seconds ======================================

The test in Robot Framework:

*** Settings ***
Library Process
 
*** Test Cases ***
test_command_line
${result} = Run Process git --version
Should Be Equal ${result.stdout} git version 2.15.2 (Apple Git-101.1)

And its execution:

pybot test_with_robot.robot
==============================================================================
Test With Robot
==============================================================================
test_command_line | PASS |
------------------------------------------------------------------------------
Test With Robot | PASS |
1 critical test, 1 passed, 0 failed
1 test total, 1 passed, 0 failed
==============================================================================
Output: /Users/laurent/Development/tmp/pytest/output.xml
Log: /Users/laurent/Development/tmp/pytest/log.html
Report: /Users/laurent/Development/tmp/pytest/report.html

On this specific example, the test syntax is quite similar. There is not so much boilerplate code for pytest so the advantage of Robot’s DSL is not so obvious. A first difference
we can note is that is for the report/log: by default pytest does not provide any HTML report/log file whereas Robot does. To get HTML report for pytest one need to install pytest-htm and invoke pytets with argument --html=report.html

Here is a quick comparison of other useful features:

FeaturepytestRobot Framework
Setup/Teardownxunit setupsetup and teardown
Tagging/Marking testsmarkerstags
Management of expected failures xunit skipping testsnon critical tests
Get some print/debug messages on stdout while tests are runningpass -s option to pytest commandLog to console
Rerun failed testrerunning-only-failures-or-failures-firstre-executing-failed-test-cases
running tests in parallelxdist and pytest-parallelpabot
Stopping after the first (or N) failuresstopping-after-the-first-or-n-failuresnot available

On a more general note, Robot should be easier to start with for people with lower development skills as it is using a simple test-oriented DSL with rich built-in libraries. But to build more complex/complete automation, users will have to switch do Python code anyway at some point. On the other end, pytest requires to start with a full-fledged langage but this comes with many features as well (huge IDE support, static code analysis etc.). So all in all, it seems that both frameworks can be used for functional test automation with no obvious winner.

For another comparison of the two frameworks, see the blog post “The classic dilemma for testers – Robot or pytest” from Opcito.

And if you have any input on this topic, feel free to leave a comment!

3 Podcasts sur l’entrepreneuriat et le succès

À ceux qui veulent se cultiver sur l’entrepreneuriat et le succès,
qui ont une longue liste d’articles de blog à lire et autant de livres sur leur table de nuit,
si vous n’êtes pas encore adeptes, je vous conseille fortement les podcast !
Voici mes 3 préférés du moment, si ça peut vous donner des idées.

Génération Do It YourSelf
Présentation par Matthieu Stefani: “GDIY est le podcast qui décortique le succès des personnes qui on fait le grand saut. Que ce soit des entrepreneurs, des sportifs ou encore des artistes, je vous propose, sous forme d’interviews sans filtre, de rentrer dans leur histoire, dans leur quotidien. Mon objectif est de comprendre leur mode de pensée, leur organisation ou encore leurs outils, et de vous proposer un véritable MBA des échecs et des succès de ces invités.”
Mon épisode préféré: Rachel Delacour – D’une chambre d’ado à une revente à près de 50 millions de dollars

Le Gratin
Présentation par Pauline Laigneau “Le Gratin (ex Crème de la crème) est une conversation sur le succès. J’y invite des hommes et femmes pour décortiquer avec eux leur réussite. Pas de domaine en particulier, cela peut être l’entrepreneuriat, le sport, la gastronomie, la médecine, le blogging, le design, le journalisme… et j’en passe. Mon objectif ? Partager avec vous les clés de leur succès lors d’une conversation à bâtons rompu. En 1h d’écoute, j’espère que vous aurez eu la sensation d’entrer dans l’intimité de ces personnes exceptionnelles et d’en tirer des enseignements pour vous inspirer et vous aider à lancer vos propres projets.”
Mon épisode préféré: Victor Lugger, cofondateur de Big Mamma : « It’s never enough »

Génération XX
Présentation par Siham Jibril :”GENERATION XX est un podcast de conversations avec des femmes qui entreprennent, à des âges et dans des milieux différents. Elles ont en commun d’être passionnées, créatives, imparfaites, inspirées et inspirantes. Chaque épisode vous fera entendre la voix de l’une d’entre elles. Le but ? Vous faire découvrir des personnalités et des parcours différents. Pas de modèles à suivre ou de recette miracle pour réussir mais de quoi vous inspirer à mener à bien vos propres projets et croire en vos idées.
Mon épisode préféré: Mathilde Lacombe, co-fondatrice de Birchbox

Et si vous ne savez pas comment gérer des podcasts sous iOS, cet article pourra peut-être vous aider !

Robot Framework, REST and JSON with RESTinstance

This is mostly a follow-up of the article Robot Framework, REST and JSON. As this article is now 5 years old, situation has evolved a bit, and recently a new REST library for Robot Framework got some attention: RESTinstance. So let’s take a quick look at it.

Before testing this new lib, let’s rewind a bit. First we need a product to test via a REST API and we will choose one that returns a JSON. For example a GET on http://echo.jsontest.com/framework/robot-framework/api/rest should return:

{
   "api": "rest",
   "framework": "robot-framework"
}

Here is how we checked the response of that endpoint in the previous article using requests library:

*** settings ***
Library  Collections
Library  requests
 
*** test cases ***
simpleRequest
    ${result} =  get  http://echo.jsontest.com/framework/robot-framework/api/rest
    Should Be Equal  ${result.status_code}  ${200}
    ${json} =  Set Variable  ${result.json()}
    ${framework} =  Get From Dictionary  ${json}  framework
    Should Be Equal  ${framework}  robot-framework
    ${api} =  Get From Dictionary  ${json}  api
    Should Be Equal  ${api}  rest

And here is how it can be checked using RESTinstance library:

*** settings ***
Library  REST  http://echo.jsontest.com
 
*** test cases ***
simpleRequest
    GET  /framework/robot-framework/api/rest
    Object  response body
    String  response body api  rest  
    String  response body framework  robot-framework

So when we do a GET, we create a new instance of an object that can then be used by the other keywords of the library. This object can be written on the console log using Output keyword. In my case I get this output:

The current instance as JSON is:
{
    "spec": {},
    "request": {
        "body": null,
        "scheme": "http",
        "sslVerify": true,
        "headers": {
            "Content-Type": "application/json",
            "Accept": "application/json, */*",
            "User-Agent": "RESTinstance/1.0.0b35"
        },
        "allowRedirects": true,
        "timestamp": {
            "utc": "2018-08-15T19:23:04.046254+00:00",
            "local": "2018-08-15T21:23:04.046254+02:00"
        },
        "netloc": "echo.jsontest.com",
        "url": "http://echo.jsontest.com/framework/robot-framework/api/rest",
        "cert": null,
        "timeout": [
            null,
            null
        ],
        "path": "/framework/robot-framework/api/rest",
        "query": {},
        "proxies": {},
        "method": "GET"
    },
    "response": {
        "seconds": 0.173237,
        "status": 200,
        "body": {
            "framework": "robot-framework",
            "api": "rest"
        },
        "headers": {
            "Content-Length": "56",
            "Server": "Google Frontend",
            "X-Cloud-Trace-Context": "8e86c2afa42b5380847247dbdc8a7e24",
            "Date": "Wed, 15 Aug 2018 19:23:03 GMT",
            "Access-Control-Allow-Origin": "*",
            "Content-Type": "application/json; charset=ISO-8859-1"
        }
    },
    "schema": {
        "exampled": true,
        "version": "draft04",
        "request": {
            "body": {
                "type": "null"
            },
            "query": {
                "type": "object"
            }
        },
        "response": {
            "body": {
                "required": [
                    "api",
                    "framework"
                ],
                "type": "object",
                "properties": {
                    "framework": {
                        "enum": [
                            "robot-framework"
                        ],
                        "type": "string",
                        "example": "robot-framework"
                    },
                    "api": {
                        "enum": [
                            "rest"
                        ],
                        "type": "string",
                        "example": "rest"
                    }
                }
            }
        }
    }
}

So when we do String   response body api   rest we are exploring this object and checking the content of [“response”][“body”][“api”] but as we can see there is much more that can be checked. This syntax was a bit unexpected for me but I guess one just has to get used to it.

The library is also quite powerful in terms of JSON schema checking (and generation). I invite you to check the README to explore it further.

Robotics with mBot #5

Follow-up of my previous articles (firstsecondthird, and fourth) about my experience hosting a robotic class in a junior high school. Here is a little wrap-up of the fifth session.

Theme of the day

This session was mostly a follow-up of the previous session. The idea was to continue working on the LED matrix and remote controls. Some of the kids were busy with another activity so we were only half of the usual troupe. So the session was much simpler to host!

Loops and Variables in Led Matrix

In the previous session, some kids started to draw animation in the Led Matrix. This time I tried to drive them to use “show drawing” at a specific position (x, y) using For loops and Variables so show the drawing at different positions (instead of drawing every single “frame” of their animation). That worked well for a couple of groups, which then could show it to other groups. The results were easy to demonstrate to other kids, so it was quite successful.

Common mistake

In the report of the session #3, I mentioned some common mistake that kids were doing (no looping, no waiting). Another one that comes over and over is that kids forget to come back to an initial state. For example, here is a typical program they would come up with:

Their expectations is that the left LED will be red for 1 second, and then the right LED will be red for one second, and so on. So that should do a sort of an infinite right-left blinking. What happens in fact is that both LEDs quickly become red and stay red…. The program should set the LED back to their initial state if we want the blinking to happen:

This notion of “initial state” is also a source of many bugs when developing Led Matrix or mouvements programs. I guess they will lean by practise!


Robotics with mBot #4

Follow-up of my previous articles (firstsecond, and third) about my experience hosting a robotic class in a junior high school. Here is a little wrap-up of the fourth session.

Open Theme

For this session, I opened the activities in different directions by proposing new hardware to play with (remote control and led matrix) and leaving the groups full choices on what they wanted to program. The deal was let them build/program whatever they wanted and show it to the other groups at the end of next session. So this session was the first part of a double session.

Remote Controls

Kids have been asking to get the remote controls since the first session. I kept them until today because I was afraid that the class would quickly turn wild with kids driving their robot all around the room. Of course, that’s pretty much what happened! The first thing they had to do to use the remote control was to reset the program on the board to default one so that they could use the arrow to drive the robot. Then I told them they could reprogram each key of the remote. That caught their attention and most of the group seemed to enjoy triggering things with the remote (nicer than triggering by pushing the on-board button).

Led Matrix

Fixing the Led Matrix on the Robot was fun for all the groups because it was an opportunity to use again the screwdriver! Almost to quick and easy to do, but fun anyway. They the “draw on led matrix” action was very successful because it allows to draw your own custom image on the matrix. This feature is similar to the “draw sprite”one in Scratch using the Paint Editor.

Combo

Using both the remote control and the led matrix, several groups ended up this session with program showing different drawings on the matrix depending on the key pressed on the remote. Let’s see what they come up at the end of the next session.


Robotics with mBot #3

Follow-up of my previous articles (first and second) about my experience hosting a robotic class in a junior high school. Here is a little wrap-up of the third session.

Good session

This session was a bit more successful than previous one I think. This time I assigned them a broad goal of “playing around” with the motored wheels of the robot (which is what they wanted to do from day 1!). I could not resist preparing a single sheet of paper with some instructions on the different steps they could follow that I gave to each group. For example the first steps were:

  • go straight for 1 second
  • go straight for 1 second and then back for 1 second
  • go around the foot of your chair with the Robot
  • start playing around with the ultra-sound sensor…

Most of the kids followed this guidance and were able to reach some satisfying results. Important to note that although the group was only made of 12 people, it was of great help that I came with a colleague to help me manage the session!  An interesting lesson from this session is the common programming mistakes kids did.

No Looping

The most typical error is to write an event-driven program without an event-waiting loop :

So here, the resulting program does…. nothing! The “if” is done immediately (and most probably the button is not yet pressed), and then it’s over. The solution is to surround the “if” with a “forever” loop:

This error is sort of satisfying at first because it allows to explain the whole “computer is dumb and only do what you ask it to”, but it’s a bit untrue to say that nowadays to a young programmer because, well, computer is super smart is does A LOT for us. We just have to assemble colored bricks to have a robot move, so why this “forever” loop should not be included in all this framework? The “computer does only what you tell it to do” sounds true only for those who did some assembly language…

No Waiting

The second most typical error is to write an series of statement that are changing the state of the machine, but without waiting between each statement:

Here the user might expect to see blinking led, but they won’t see it because the program will execute too quickly for a human to see it. So here the solution is to add some wait command between each change of state:

Once the kids had those 2 fundamental rules in mind (looping and waiting), they were able to make some good progress!

Robotics with mBot #2

Follow-up of my previous article about my experience hosting a robotic class in a junior high school. Here is a little wrap-up of the second session.

Preparation

When I was preparing this second session, I started to write a little memo of the things I wanted to share (a mix of a recap of last session and theoretical introduction!) and some exercise ideas (and proposal of solutions). So I came up with this mini-lesson :

and this list of mini-project ideas:

I printed a dozen copies and came to the class with my stack (and some pride!). I probably dared to picture a group of 12 kids reading the document while nodding in approval and then getting on their machine to execute some of my proposals…

Execution

Of course this scenario did not happen at all! The attendees were very excited to see their little robot again (after 2 weeks break) so all they wanted to do was start tinkering with them! After 1 minute most of them were already starting to program and not paying any attention to my little speech about what are the robot “inputs” and “outputs”. So I tried to be as concise as possible and essentially gave up with a “ok, go ahead and enjoy”.

Lesson

Obviously the top-down approach I came up with was not the right one. The essence of this sort of class is to give some tools to a group and let them play, discover, assemble, dissemble etc. That’s quite demanding for the host though because everybody will react differently and answering to their unique/unexpected requests (I am trying to do X and have this problem) will be more complicated than just giving hints for a problem that was asked to the whole group.

Question

Main question I am fighting with about this all pedagogy topic is if I should hope to reach some milestone in term of knowledge or achievement where I could stop and say “ok, now we’ve understood, as a group, the concept of variables/loops/whatever”. Probably not needed.

Robotics with mBot #1

This year, I volunteered to lead a robotic class in the local high school. I will share some bits of this experience in here. Maybe someday that will help someone going through similar project!

Context

Junior High schools in France are for “kids” from 11 to 14. They do have some classes about computer usage and programming. In this school, Scratch is used by teachers to show programming concepts. Some extra-curriculum activities are offered as well, among which a robotic class was started last year. The initiator of this class chose to work with mBot robots. So I am continuing this class, on a 1 hour every 2 weeks rythme for the whole school year.

Settings

I host the class during lunch break with 12 kids organised in 6 pairs. Each pair is sitting behind a large-enough table (so they can have some room to manipulate the robot) and they have a Windows PC with mBlock installed. They can save their work on their private network folder to start from there on next class.

Robots

So I did not choose the mBots and can’t share all the motivations for this choice. But one thing quite handy with those robots is that the programming tool associated with them (mBlock) is a fork of scratch. So for kids who used Scratch before, this is perfect. In addition, the robots seem to be reliable and robust. For our class we have 6 robots, so one per pair of kids. We decided to stick with the USB connection between PC and robots: more reliable than bluetooth and WiFi connections from our tests.

Session #1

For the first session, I was helped by the initiator of the project. The robots were already mounted but we decided to completely disassemble them and present them to the kids as if they were just acquired. This way, the first session was started with the mounting the robots (following the user guide). This was way smoother than expected and most groups finished in 20/30 minutes and were able to start connecting the robot to the PC and coding before the end of the class. I had found (and printed) a couple of examples of programs (that were recently added on the mblock site) that I gave them so that they could kick off some little projects and see some LED blinking or hear some buzzer buzzing.

Take aways

  • No surprise here, but kids are not shy with technology! The group was made of volunteer, so not at all a representative sample of the school population, but it was still surprising to see them mounting, plugging and clicking without any sort of restraint.
  • Screwdrivers are delivered in the mBot box. Kids are happy to use them to mount the robot. Though once they get too excited, some of them tend to use them as swords to combat other kid. Advice: take back the screwdrivers once they don’t need them anymore :-)
  • Most of the kids have no idea what an RJ45 socket is… Wifi-generation! I had to show to some groups how to insert it the right way, and how to push the little ear to remove it!
  • To share some important messages/information to the group, the only moment seem to be the beginning of the session. Later they are all in the middle of something and it’s difficult to get everyone attention. And at the end of the class, they just disappear like a flock of bird!


Comment écouter des podcasts

Vous entendez parler des podcasts mais n’avez pas réussi à comprendre comment en écouter avec votre iPhone ? Nous allons détailler ici chaque étape afin que même les plus débutants d’entre vous puissent y arriver. Nous utiliserons l’application “podcast” d’Apple.

1) trouver l’application podcast

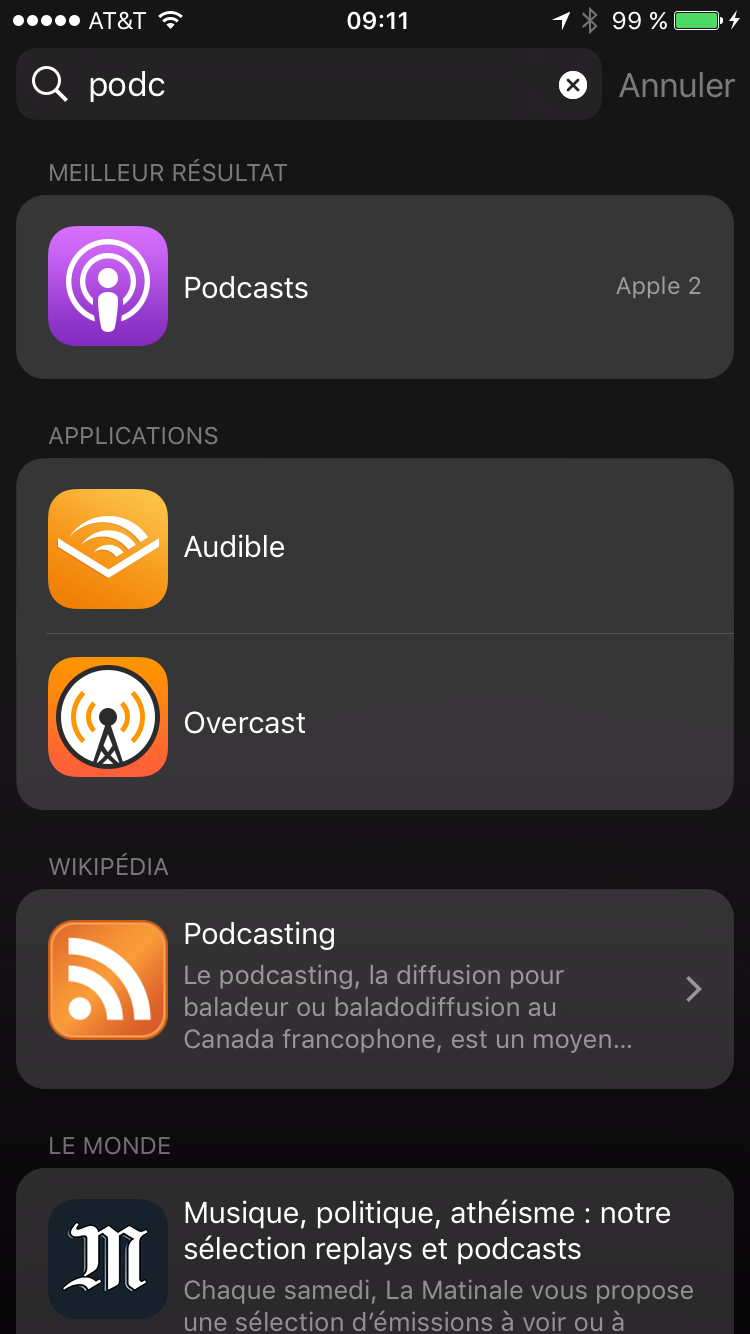
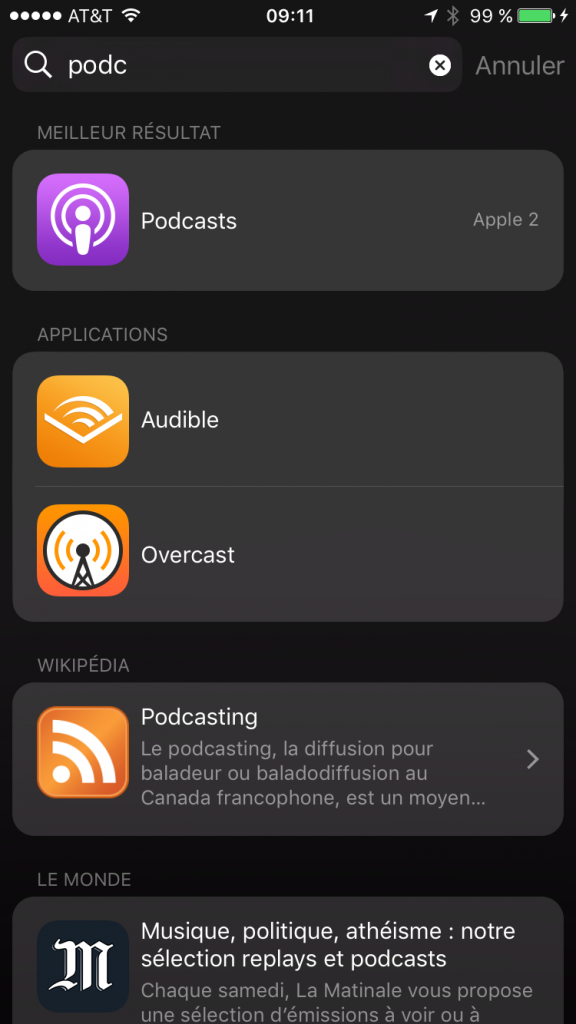
L’application “Podcast” est livré par défaut avec vote iPhone. Et comme il est impossible de la supprimer, elle doit encore être là. Si vous ne la trouvez pas, le plus simple est de faire une recherche. Pour ça, faites un balayage vers la droite sur l’écran d’accueil de votre iPhone, et vous arrivez dans la page de recherche où vous pouvez chercher “podcast”:

img_1347

2) Lancer l’application Podcast

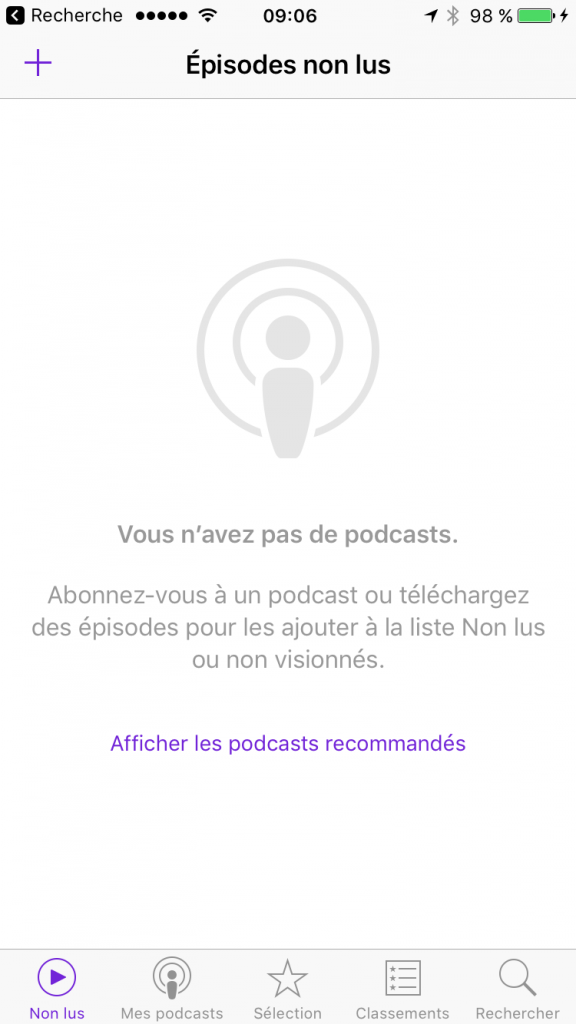
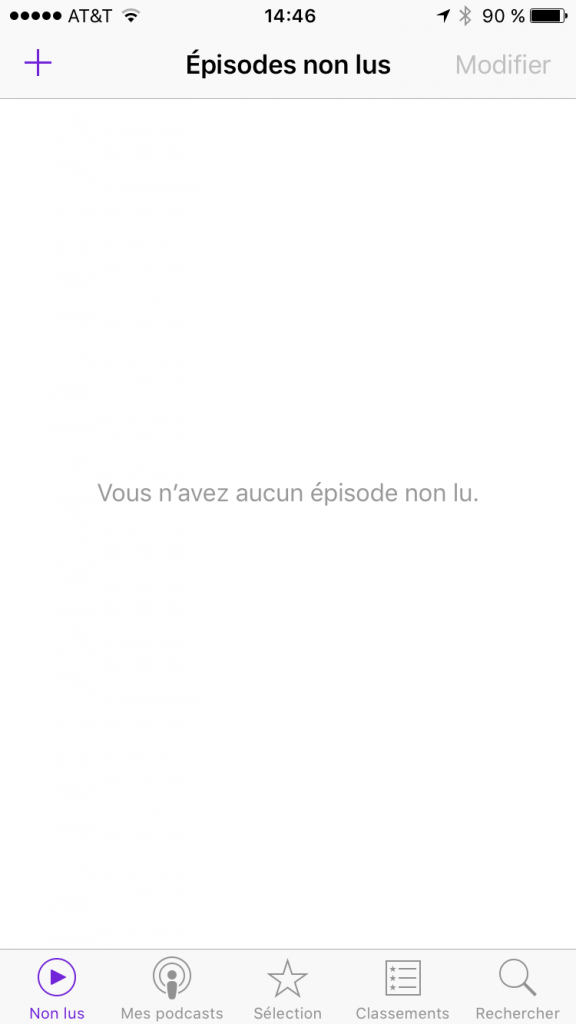
Au premier lancement de l’application, vous arrivez dans l’onglet “non lus” (la barre d’onglet est en bas de l’écran). Comme l’indique l’application, vous n’avez pas de podcast pour l’instant et il va falloir aller en choisir.

img_1346

3) sélectionner un podcast

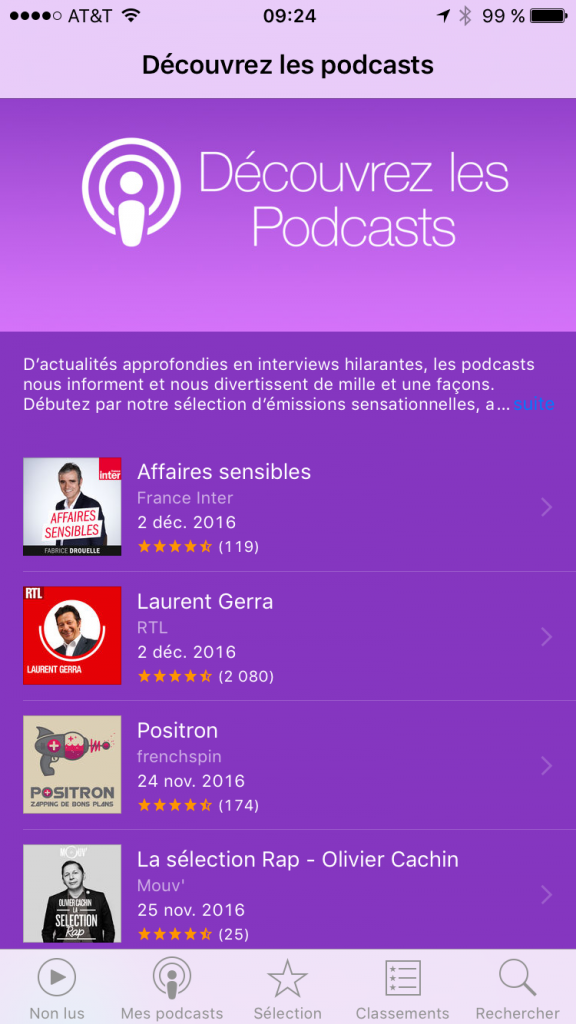
Sur l’écran d’accueil de l’application podcast, vous pouvez cliquer sur “Afficher les podcasts recommandés”. Au moment de l’écriture de cet article, la liste proposée était la suivante:

img_1348-1

Avant de choisir un podcast dans cette liste, vous pouvez aussi cliquer dans les onglets “Sélection” et “Classements” afin d’avoir un plus grand choix de podcasts.

img_1349

img_1350
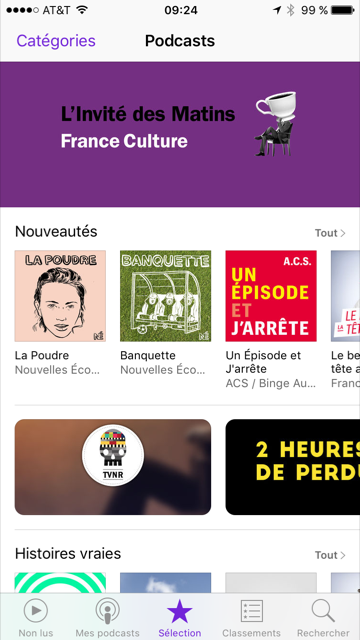
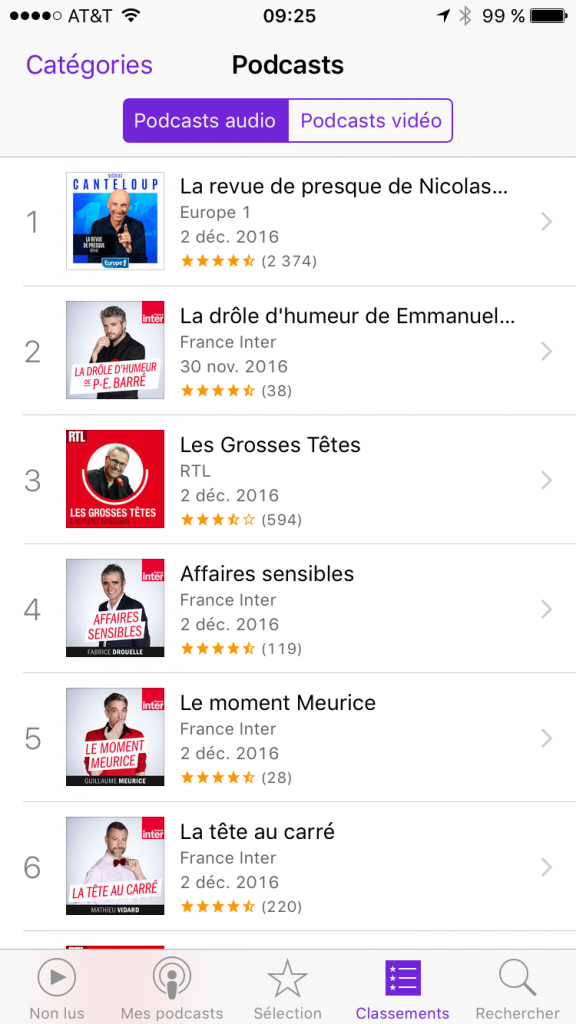
Dans l’onglet “Classements”, vous pouvez cliquer sur “Catégories” afin de filtrer la liste sur une seule catégorie.

Pour la suite de l’article, nous allons choisir un podcast : le billet de Nicole Ferroni. Si il n’apparait pas dans les 3 écrans précédents, vous pouvez utiliser l’outil de recherche de l’application (choix “Rechercher” dans l’onglet du bas).

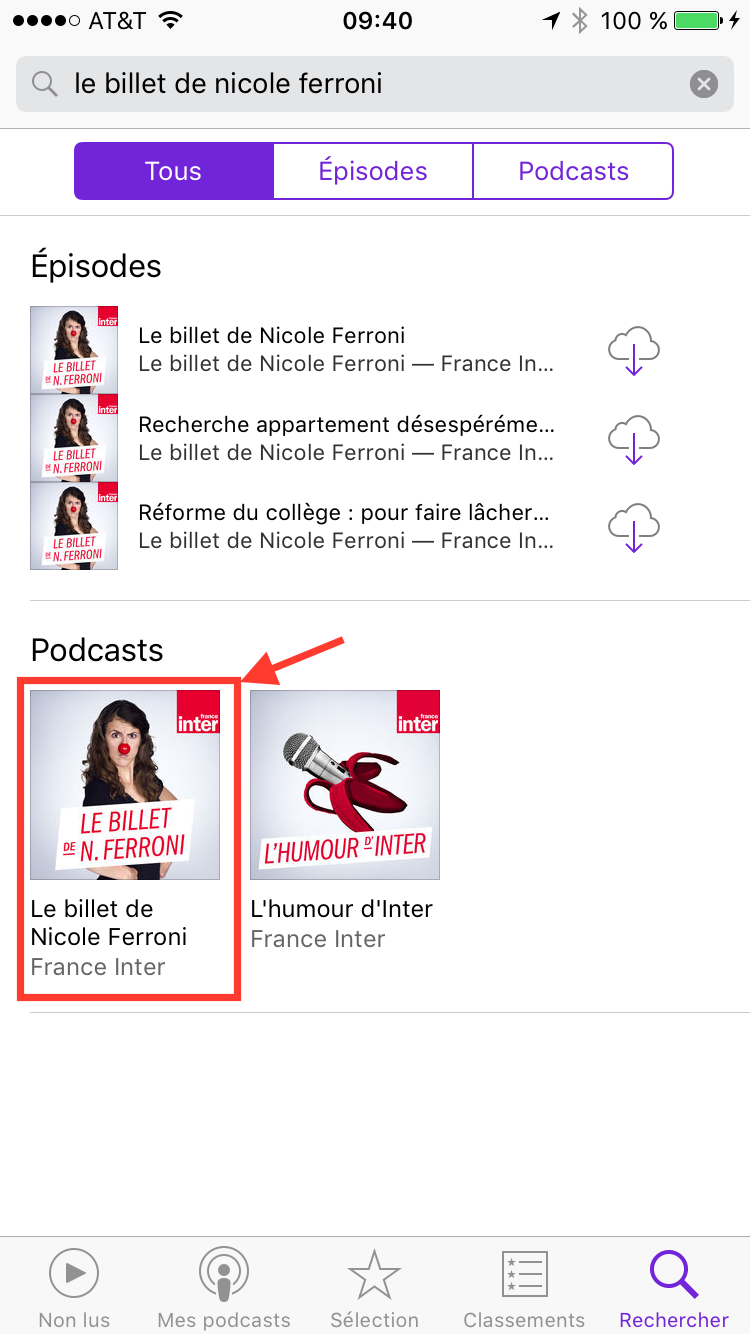
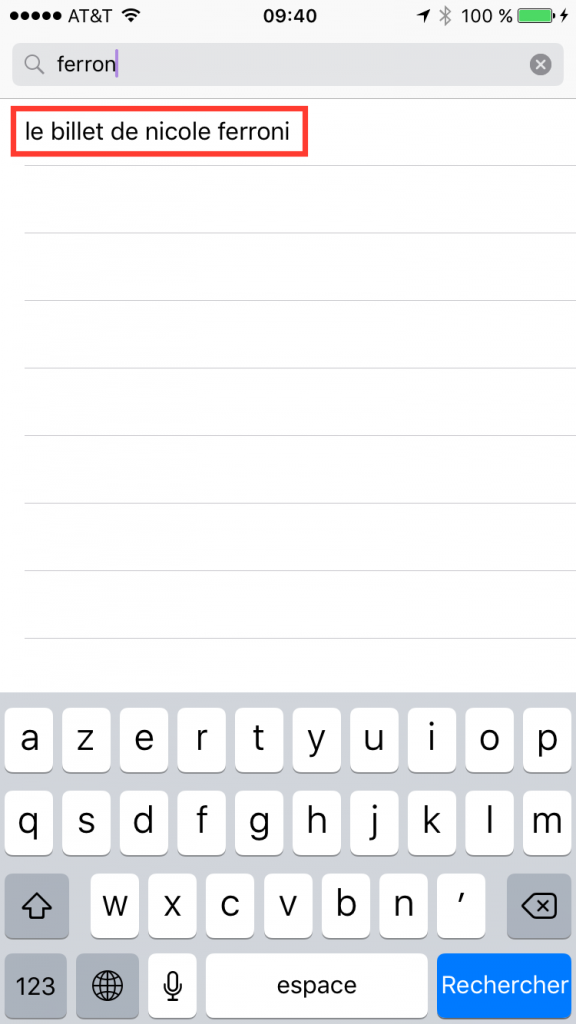
Une fois dans l’écran de recherche, tapez les premières lettre de “Ferroni” et le podcast devrait apparaitre dans la liste. Cliquez dessus :

img_1351

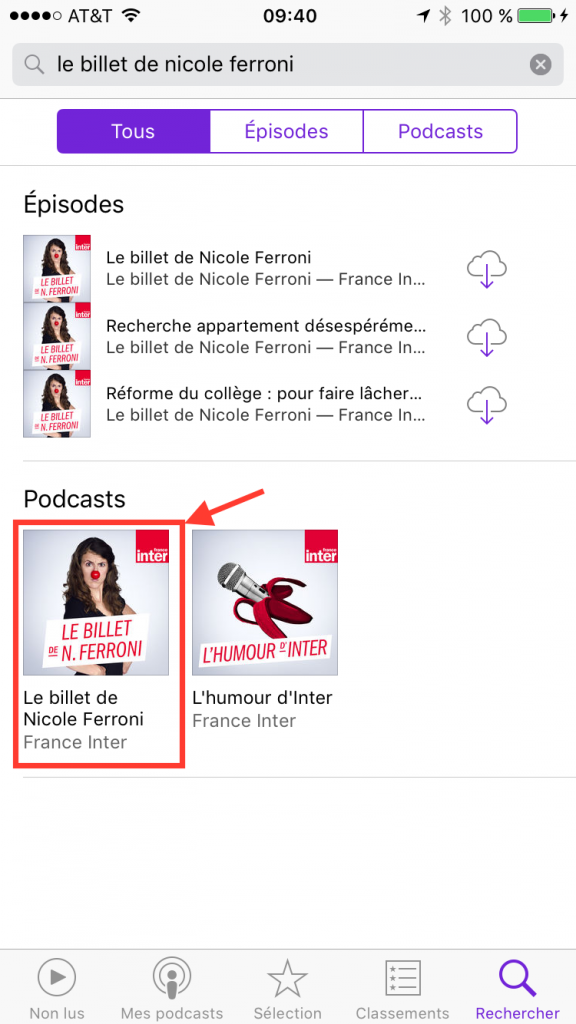
Vous arrivez dans la page de résultat de la recherche. Dans cette page il y a des épisodes et des podcasts. Plutôt que de télécharger des épisodes de façon unitaire, nous allons voir par la suite comment s’abonner à un podcast (car c’est dans ce scénario que les podcasts prennent tout le sens). Il faut donc cliquer sur le podcast “le billet de Nicole Ferroni” dans la section “Podcasts” des résultats de recherche:

img_1352

4) s’abonner au podcast

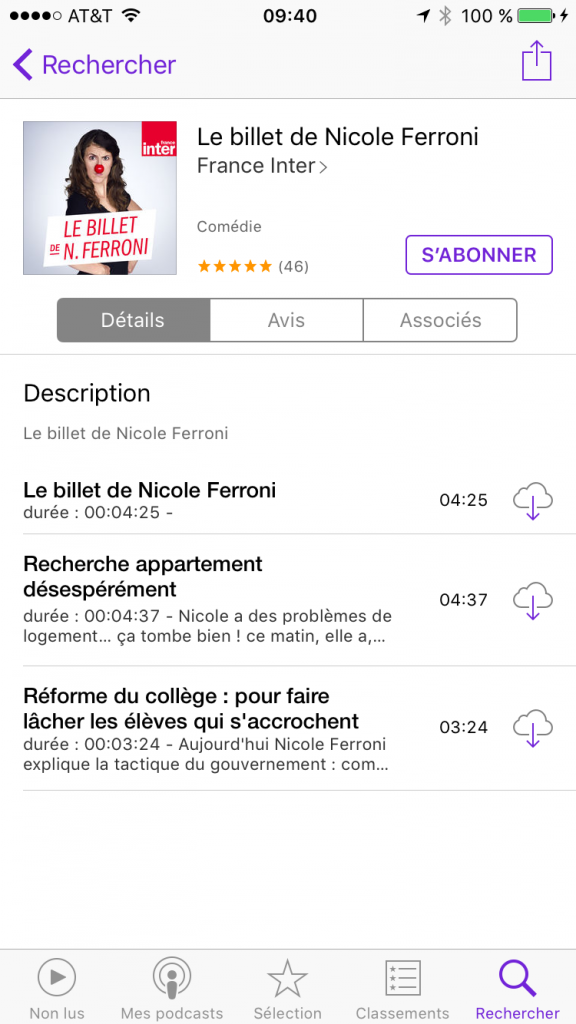
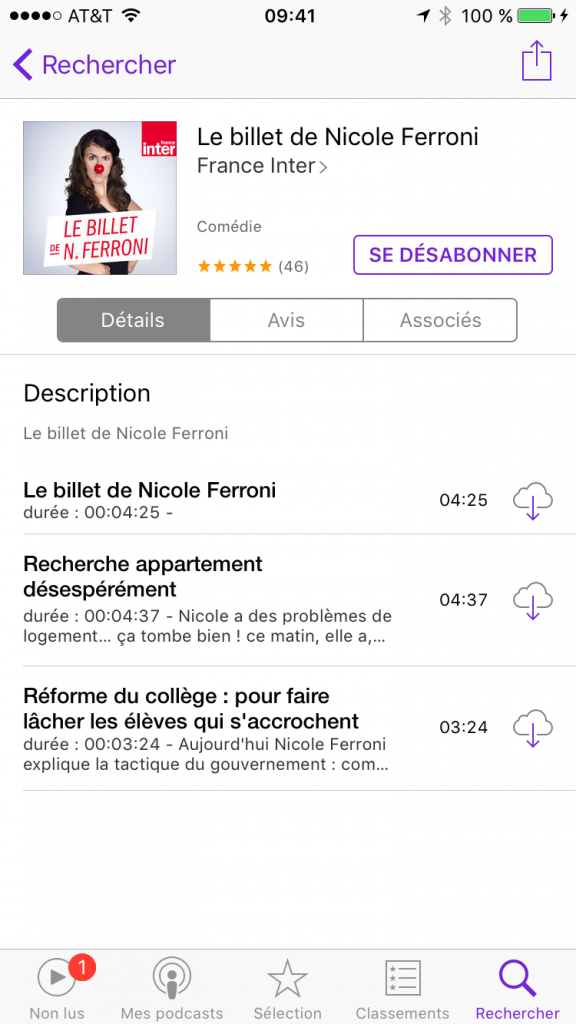
Une fois que vous êtes sur la page de votre podcast, vous avez le choix entre vous abonner au podcast (bouton “s’abonner”) ou télécharger des épisodes en particulier (les icônes ave le nuage et la flèche en face des épisodes qui sont listés):

img_1353

Comme expliqué plus haut, nous allons nous abonner afin de recevoir régulièrement les nouveaux épisodes futurs. Une fois que vous avez appuyé sur “s’abonner”, on voit apparaitre un petit 1 dans la barre du bas sur l’icône “non lus”. C’est là que les épisodes du podcast seront disponibles.

img_1354

5) télécharger son premier épisode

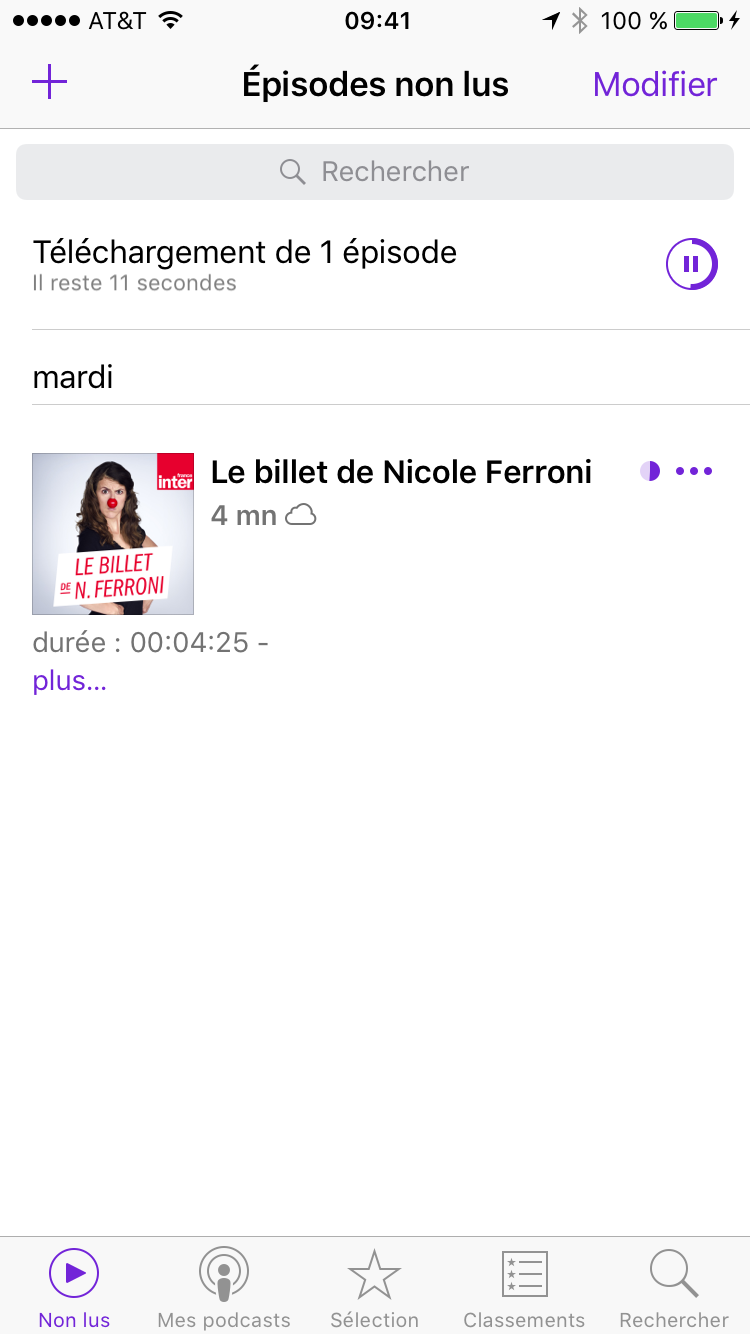
Lorsque vous vous abonnez, le dernier épisode du podcast disponible se télécharge automatiquement. Si vous allez sur l’écran “Non lus”, vous voyez que l’épisode est en cours de téléchargement:

img_1355

Et comme c’est un fichier audio (plutôt petit donc), le téléchargement devrait être assez rapide et il devrait être disponible pour la lecture en quelques secondes ou minutes:

img_1356

6) Ecouter son premier épisode

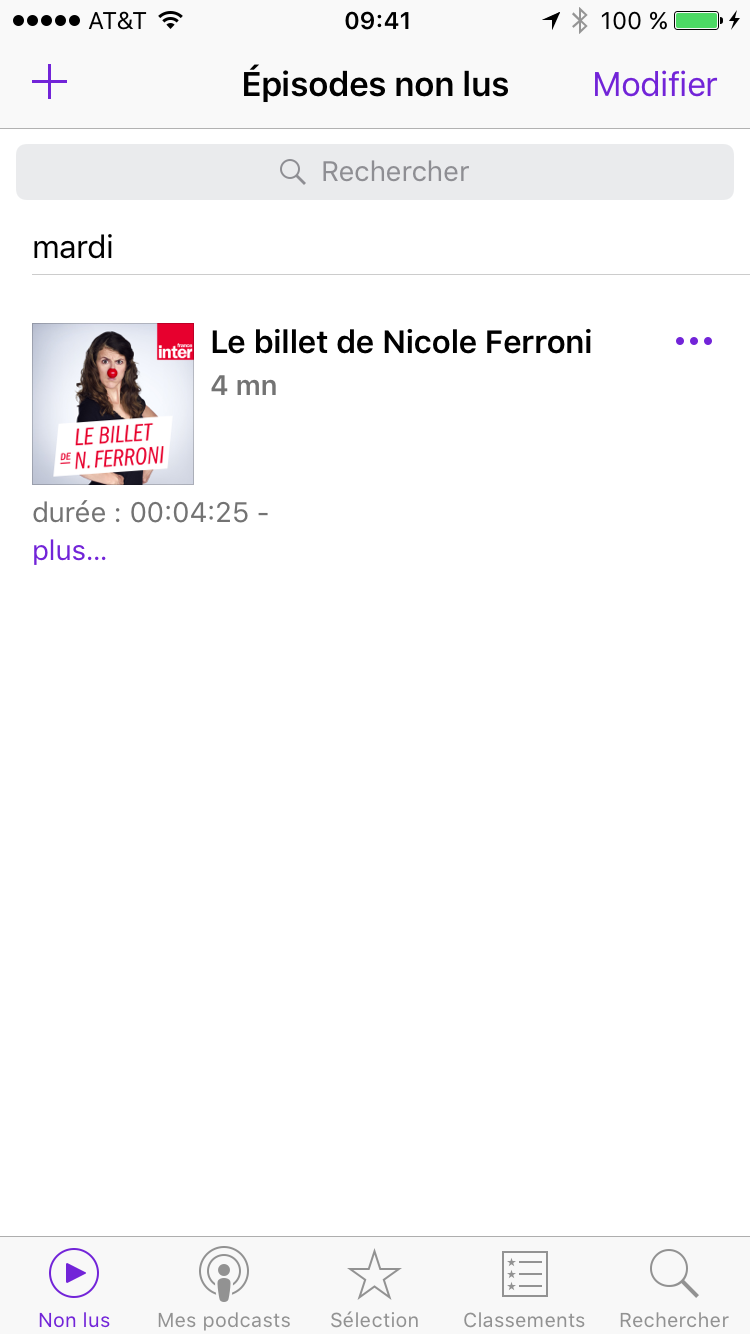
Il suffit de sélectionner l’épisode disponible pour que la lecture commence:

img_1358Si vous arrêter la lecture avant la fin de l’épisode, vous pourrez y revenir quand vous voudrez et cela reprendra exactement ou cela s’était arrêté.

7) télécharger d’autres épisodes

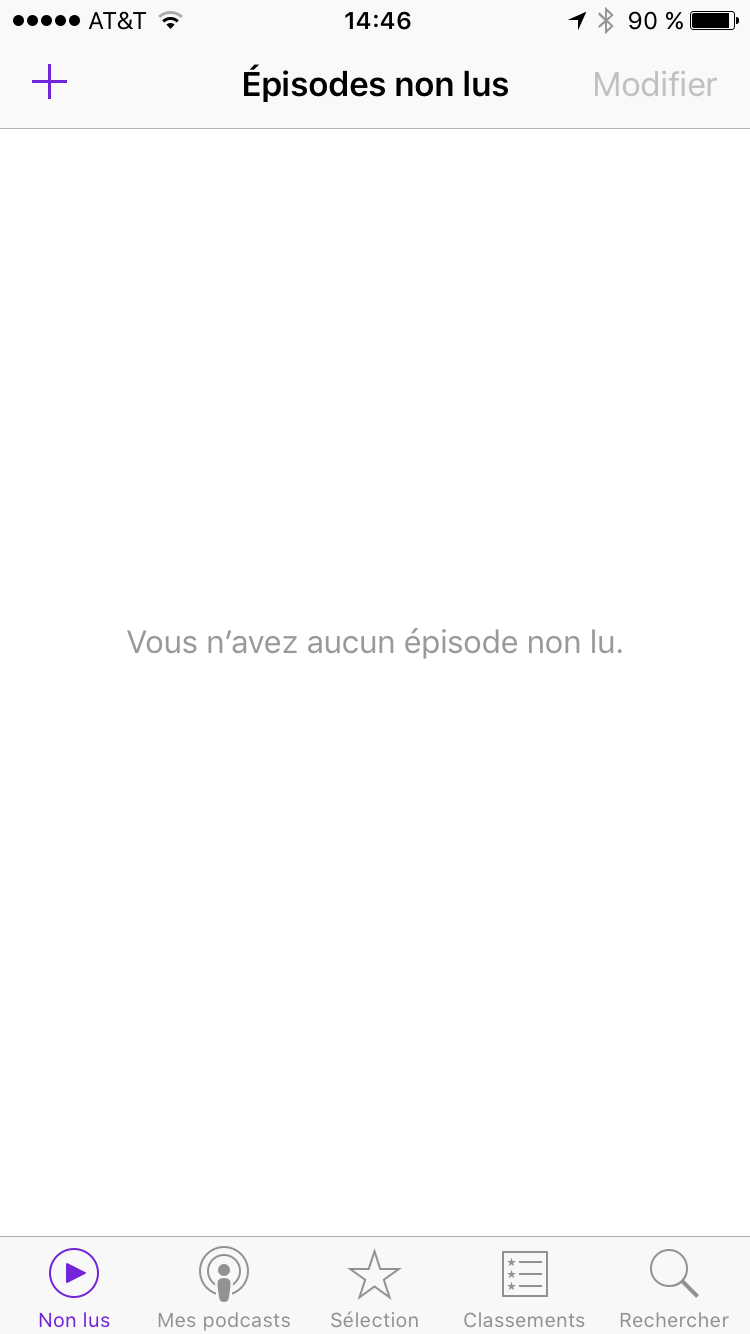
Si vous avez terminé d’écouter votre premier épisode, votre écran “Non lus” devraient maintenant être vide :

img_1359

Si vous ne faites rien et attendez quelques jours, lorsque France Inter va publier un nouvel épisode de Nicole Ferroni, il sera automatiquement téléchargé (quand vous êtes sur un réseau Wi-Fi). Vote liste de lecture va donc s’alimenter toute seule en fonction des publications des podcasts auxquels vous êtes abonnés. Notez que vous ne prenez pas grand risque en terme de taille de stockage sur votre téléphone car les fichiers audios sont plutôt petits.

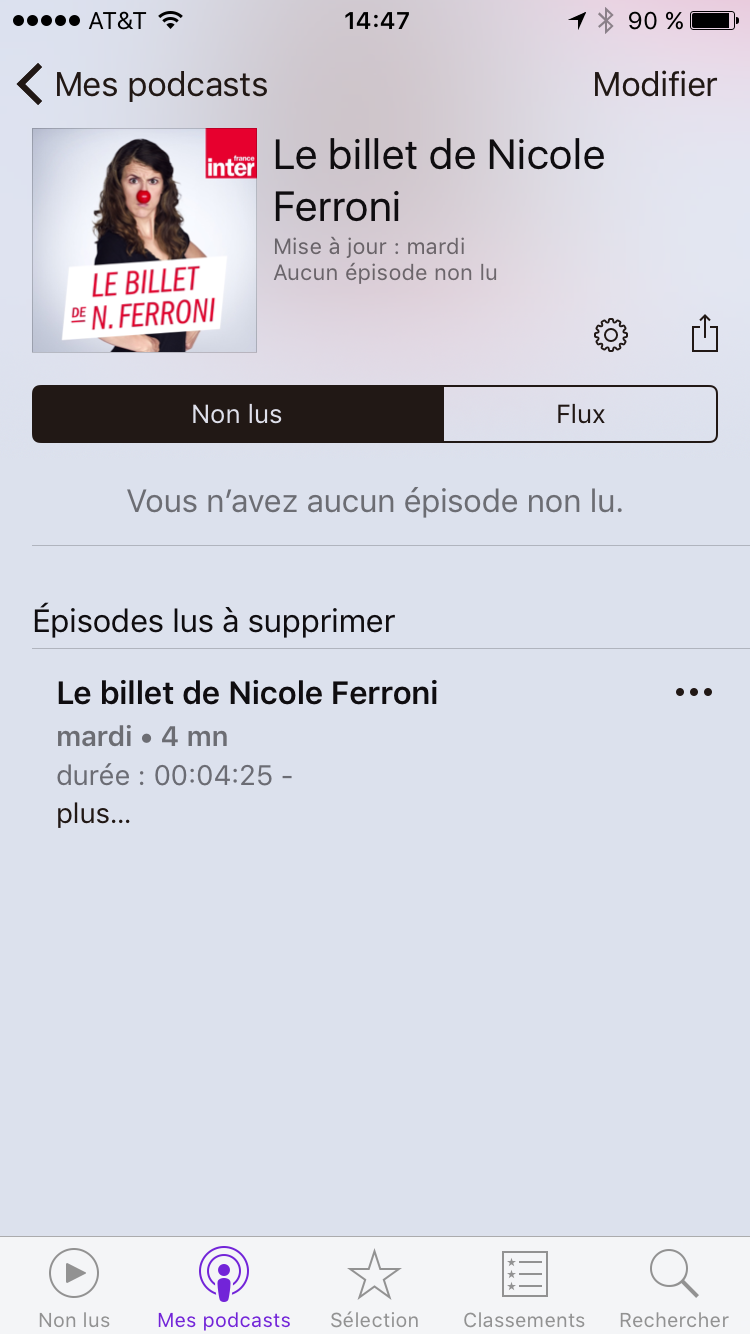
Si vous ne voulez pas attendre le prochain épisode, vous pouvez aller piocher dans les anciens épisodes. Pour cela, allez dans “Mes podcasts” et choisissez le podcast auquel vous êtes abonné:

img_1361

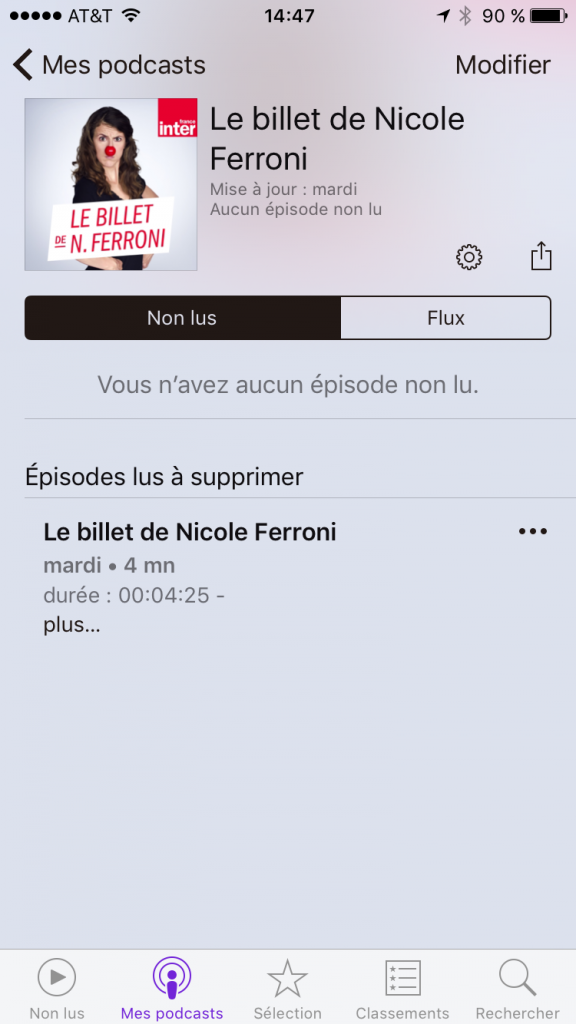
La liste des “Non lus” est vide et dessous on voit apparaitre l’épisode lu. Pour voir la liste des épisodes passés, il faut choisir l’onglet “Flux” (pas super intuitif…):

img_1362

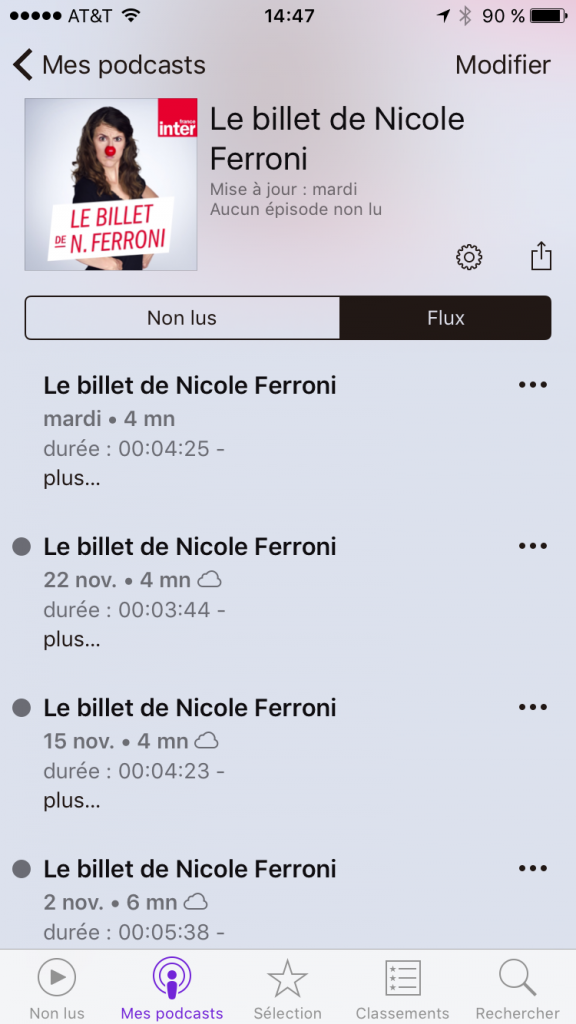
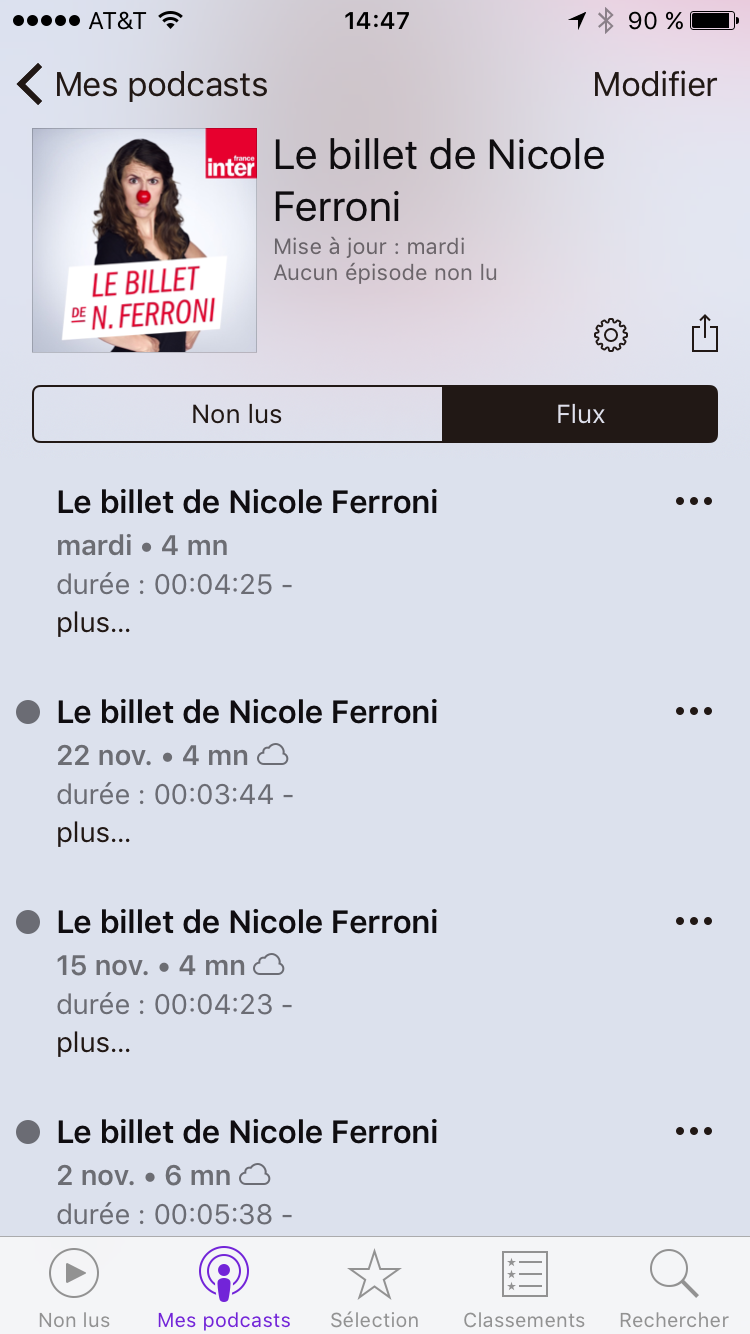
Là vous trouvez les épisodes dans l’ordre inverse de publications (des plus récents aux plus anciens). Si vous choisissez un épisode, la lecture se lance automatiquement ce qui n’est surement pas ce que vous voulez faire, l’idée étant plutôt d’en télécharger plusieurs pour les écouter en faisant son prochain footing. Pour télécharger les épisodes il faut cliquer sur les 3 petits points (encore une fois super intuitif…):

img_1363

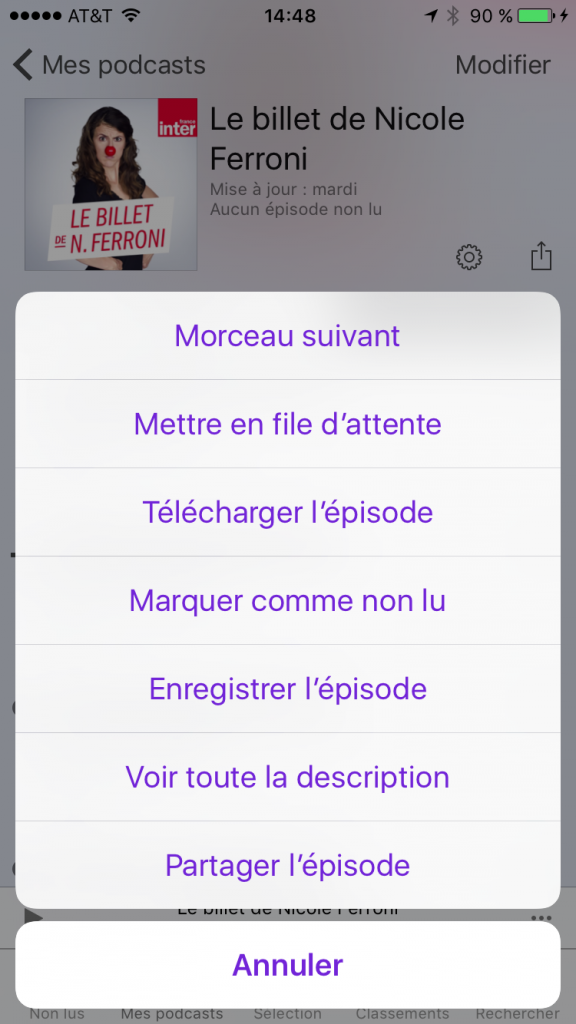
Choisissez “Télécharger l’épisode” et faites de même pour tous les autres épisodes que vous souhaitez télécharger. Ensuite vous pouvez retourner sur l’onglet “Non lus” où vous devriez retrouver les épisodes que vous avez choisis qui seront rapidement téléchargés:

img_1364

Vous savez donc maintenant faire un petit stock d’épisodes d’un seul podcast. Si vous souhaitez vous abonner à plusieurs podcasts, le principe est le même. Retournez à l’étape du choix du podcast, et choisissez d’autres podcasts auxquelles vous abonner.

Quelques informations pour aller plus loin:

  • quand les épisodes s’empilent trop, vous pouvez les effacer dans l’onglet “Non lus” en balayant vers la droite (l’option “Supprimer” apparait). Même chose pour supprimer complètement un podcast: balayage droit dans l’onglet “Mes podcasts”
  • si vous cherchez des podcasts à écouter, vous avez donc pas mal de choix dans l’application, mais vous pouvez toujours jeter un coup d’oeil à ma selection.
  • si l’application “podcast” vous donne des boutons, vous pouvez aller regarder du côté de Overcast qui est très bien faite (mais pas non plus complètement intuitive)

Bonne écoute !!!