Live-coding session of Robot Framework on Mac

Back in november, I hosted a talk at SoftShake. Like mentioned in my feedback post, I included some live-coding during the session. For the record, I’d like to share the set of tools I used to be comfortable doing this Robot Framework live-coding on my Mac.

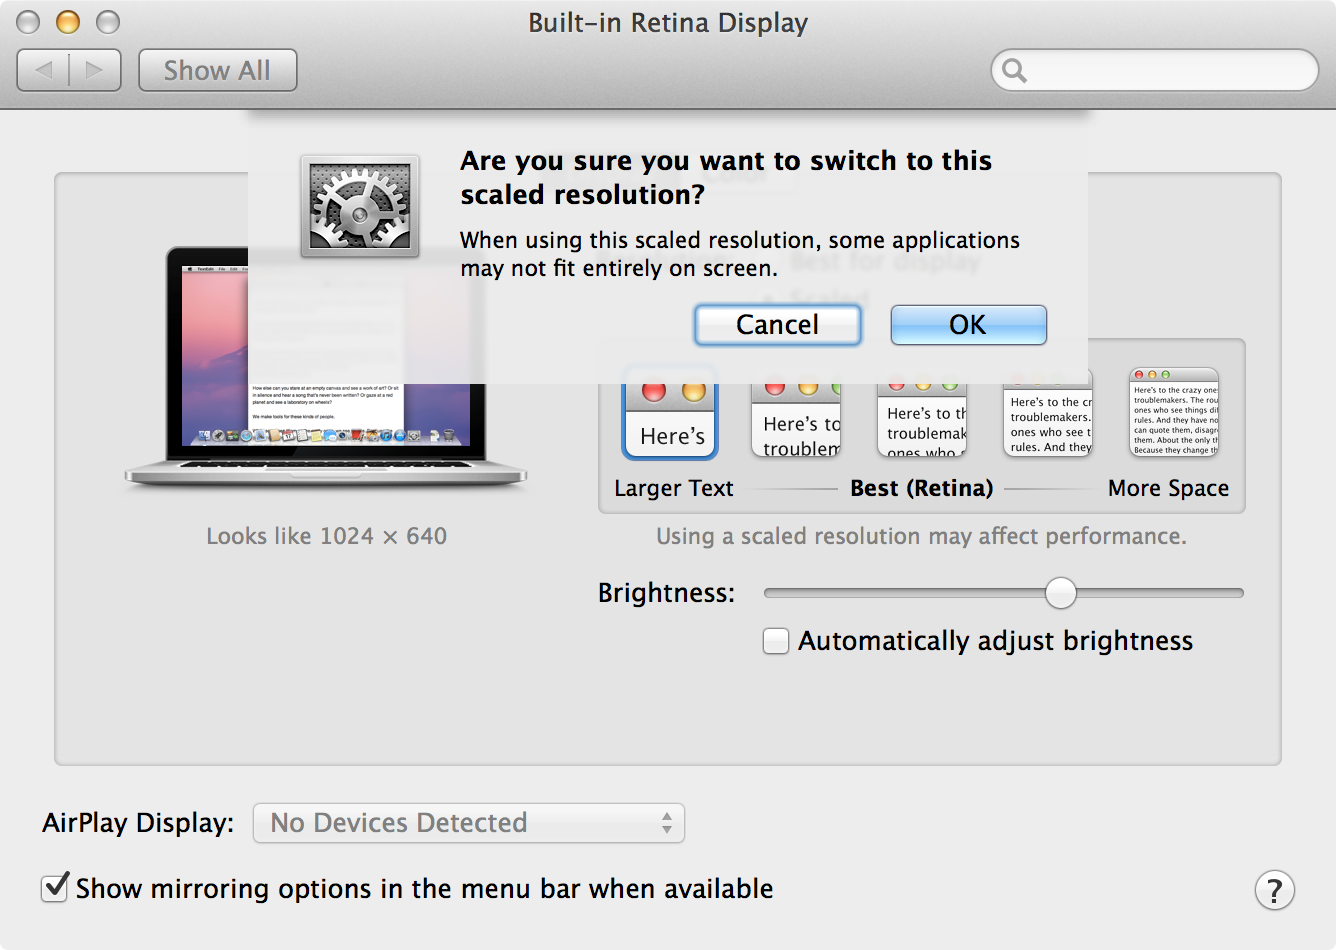
1) Screen resolution: once plugged to the projector, the resolution available suddenly become very low. So it is important to rehearse the session using this low resolution, otherwise it will be very disturbing on the actual day. Choosing the largest display in Preference should get a resolution close to the projector if we don’t have access to one.

resolution

2) Window manager: I use Spectacle to quickly change windows arrangement setup. There are keyboard shortcuts to display windows on full, half or quarter of the screen. Once you get used to it, you can very quickly set 4 different windows in a couple of seconds on the screen.

spectacle

3) Terminal  : I use iTerm2. In order to quickly get 4 small shell windows, I place them on the screen using Spectacle and save the window arrangement in iTerm2. Then I can associate a keyboard shortcut to this arrangement to get it very quickly during the presentation.

iterm2 restore windows arrangment

iterm2

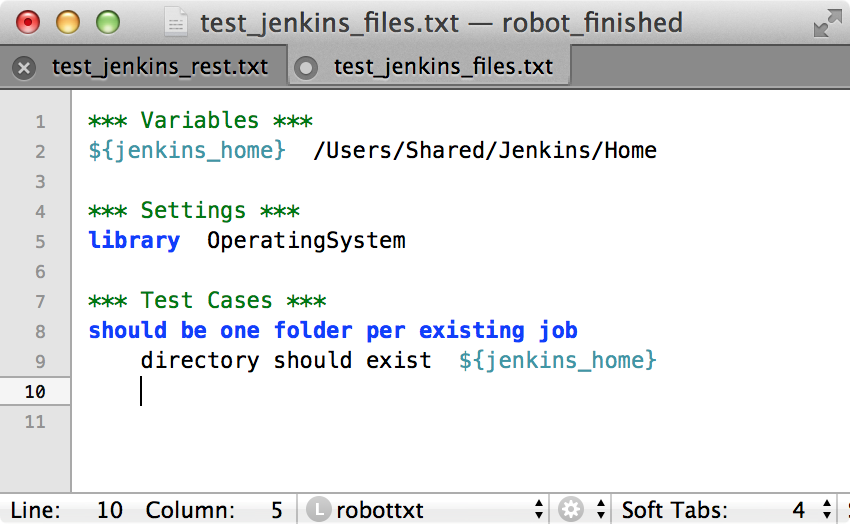
4) Text Editor. I use Textmate 2 (pre-built version here) with the Robot Framework Bundle. The bundle offers some keyboard shortcuts like *s⇥ which insert the *** settings *** header and nice color highlighting . There is no keyword completion though…

textmate


5) Live execution of the test. I wanted to obtain an effect similar to infinitest plugin with which each time a change is made on the source code, Infinitest runs the tests in the IDE. So I installed fswatch to run a script every time a directory content would be modified (i.e. every time my test would be updated) and created a small launch_robot.sh script that would be launch in such an event (script does clear + launch Robot).

fswatch


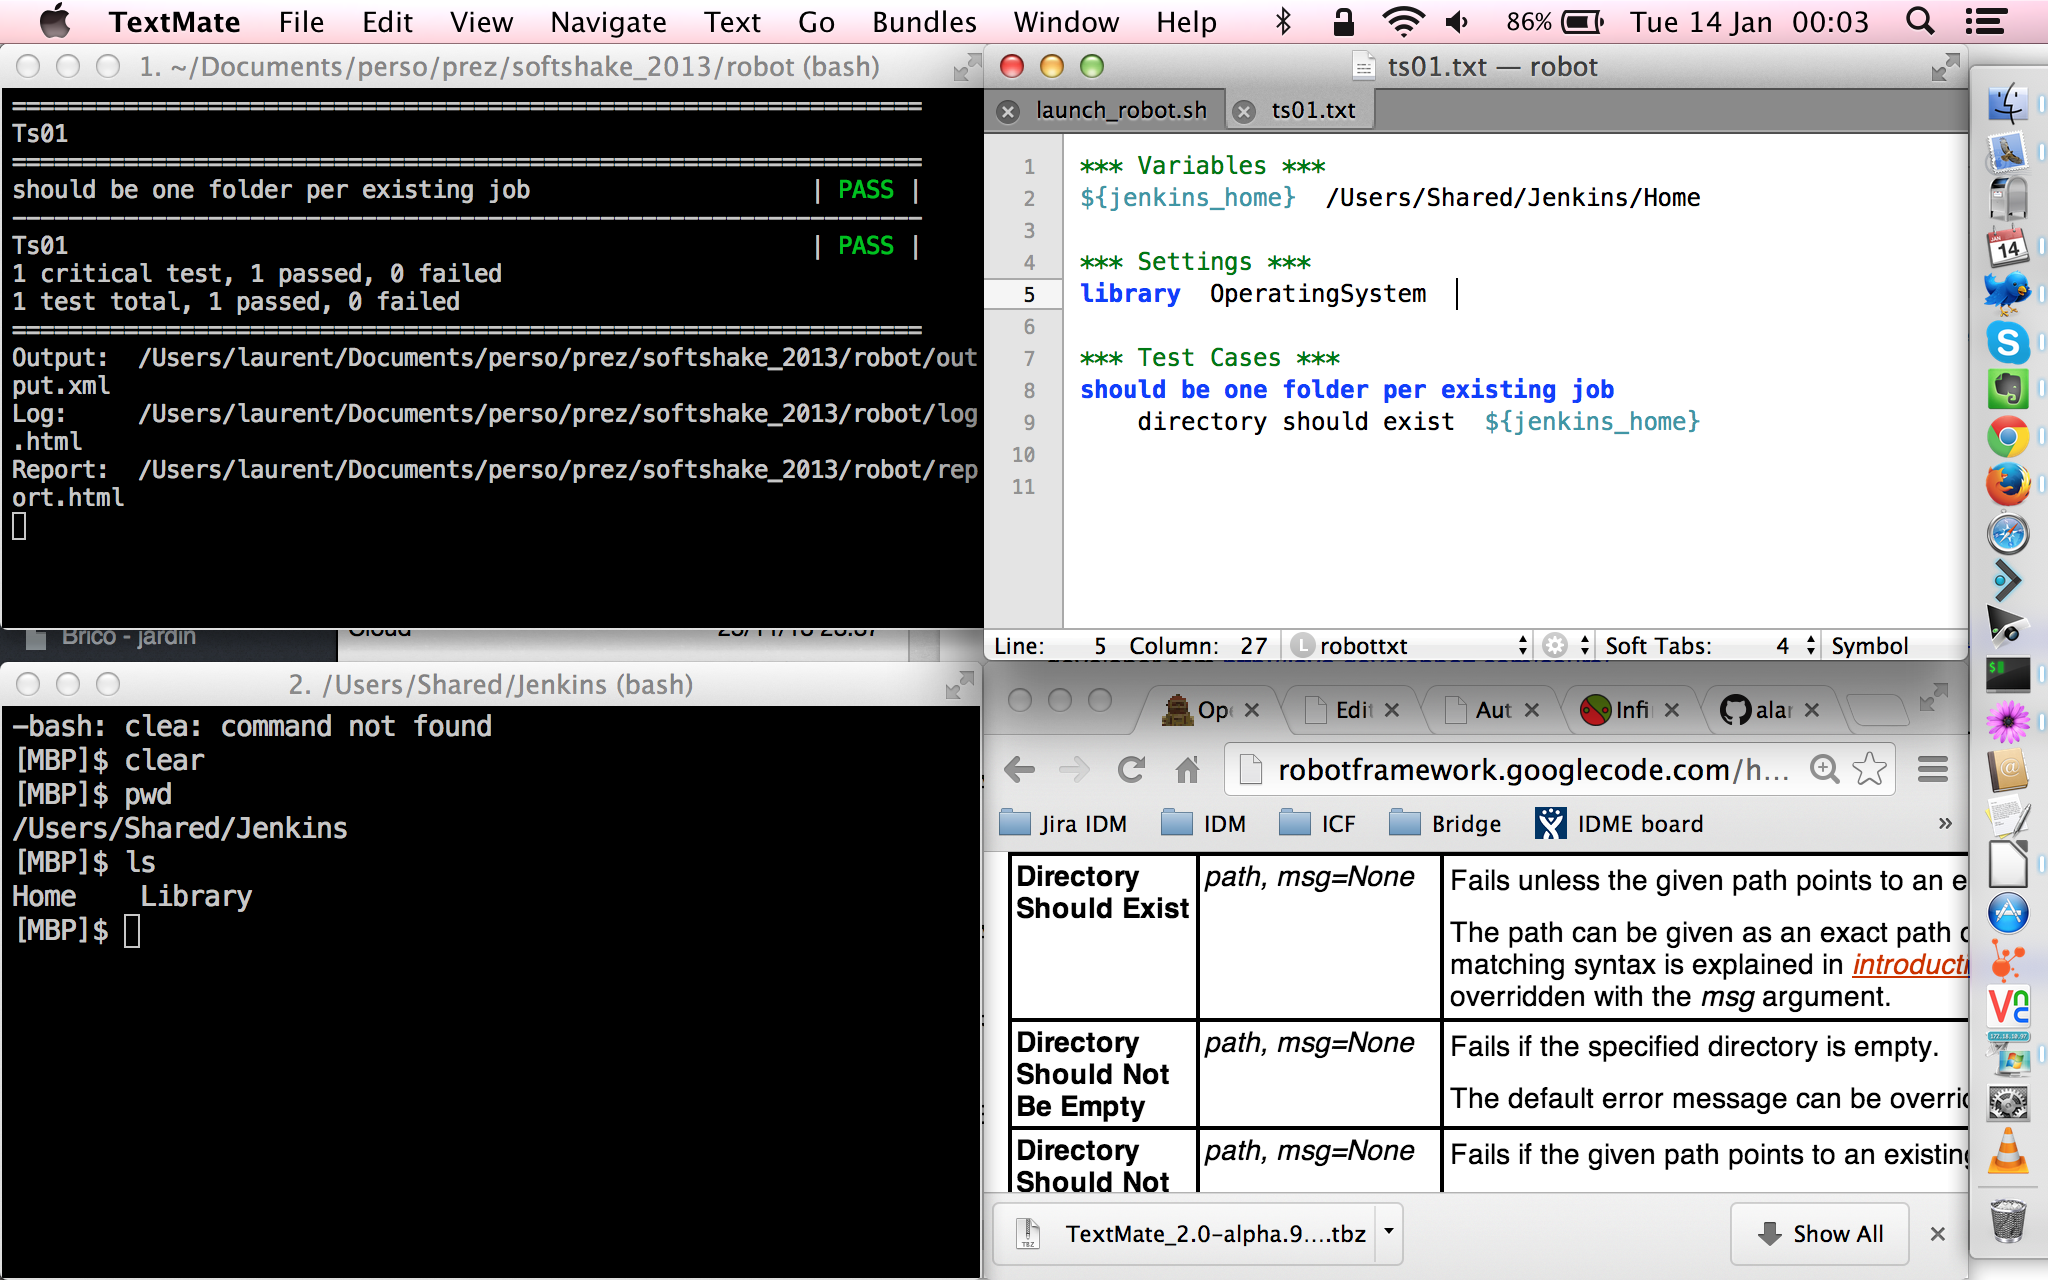
So, I chosed to display 4 windows during the live-coding:
1) top-left: live-execution of Robot Framework
2) top-right: source code of the Test modified live
3) bottom-left: Software Under Test. Jenkins for this session (either file structure or the UI)
4) bottom-right: web browser with Robot Framework Library documentations to show the keywords I used in my code.

live


During the session, the test regularly went from green to red when I added a not-yet-created keyword or used a keyword in a library I forgot to import. So the idea was to save the file as often as possible to see the result change color at the same time.

An idea for a future session could be to do the full BDD-TDD test-code-refactor cycle:
– show a spec of dev to do
– write the failing functional test with Robot
– write the failing unit test in Java with any unit test framework
– write the minimal code to get the unit test green
– refactor the code and the test
– launch the functional test and update the code to make it green if it is still red

This could even be performed by 2 people: one QA and one dev… Will see if I ever try this!

How to solve intermittent issues and get more robust automated tests

In the last episode of their podcast, Trish Khoo and Bruce McLeod discussed how to solve intermittent issues in automated test suites. Trish also made a presentation on this topic at a Selenium Conference. In those both media, Trish and Bruce go over different topics:

1) test design
2) logging
3) tolerance
4) have stable systems
5) some tips (prefer “wait for” to “sleep” for example)

I recommend you to consume those 2 presentations. Here are some notes on those topics with some comments on how I approach them with Robot Framework.

On test design, as automated tests are code, all the principle of clean code should be applied to tests: small functions, single responsibility, DRY, no side-effect. There is a specific chapter on “clean tests” in “clean code” by Uncle Bob where he discuss readability, use of DSL, single assert per tests and FIRST principle. In Robot Framework, creation of keywords is so quick and easy, that I tend to create as many as needed until I obtain test cases which are 10 lines long max with given-when-then sections clearly identified.

On logging, in Robot Framework, I have a keyword that I launch in the Teardown of every single test that check the ${TEST_STATUS} variable (filled by Robot engine). If the test if FAILED, then I create a backup folder where I backup a lot of data on the current state of the SUT (log files, audit files, configuration files, database content etc.).

On tolerance, in my previous company we were doing financial computation, and from version to version, the results of some functions could differ very slightly due to change in algorithm or compiler. So we agreed with Product Management team on threshold that were accepted and created smart comparison keyword that were taking 3 arguments: expected result, actual result, threshold. That made the tests way more stable.

On tips, the “wait for” rather than “sleep” tip is a one I use all the time. First because most of the fixed-time-sleep should be prohibited in the tests for performance reason (see my post on performance of tests) and then because sleep might be too long or too short on some systems. Another keyword/pattern I use in Robot Framework in the “wait until keyword succeeds“. This is the “wait for” applied to any keyword. When there are some timing issues in the tests, this keyword can be very very handy.

Finally, setup and teardown are a keystone of stable tests. They should be extracted from the tests and should leave the system in a state where any other test can be run afterward. This does not mean to leave the system in a identical state than when the test started (that could be very time consuming depending on the SUT and the actions performed by the tests). But we should be in a “known state” in which we know the following tests will be able to run OK.

All that being said, I have a couple of instable tests, so I’d better apply all those rules quickly…

Robot Framework Test Automation – The Book

Packt Publishing recently released a new book about  “Robot Framework Test Automation” by Sumit Bisht. The book is a quick and easy 100 pages read that can be useful to those who find the user guide a bit to dry.

First chapter helps go through the installation steps but fails at giving a clear picture of Robot Framework ecosystem: a diagram shows a “testing tool” component being the one that actually target the SUT while Robot Framework is more on the user end side as a coordinator. This is just one way to use Robot (a way that is later described more in details in section about Robot+Selenium and Robot+Sikuli). But Robot can be used to test directly the SUT through its native libraries or some custom libraries.

Second chapter is quite clear about the different file format and the organization of the test portfolio. Third chapter treats the actual creation of test cases with some data about syntax and libraries, but it lacks some examples going from the easiest to more complex cases. Chapter four discuss Robot association with other testing tools (like mentioned before) and finally the last chapter helps generating standard and custom reports.

A topic that is not covered is who is the “ideal” Robot Framework user. It is implied in chapter three that “developer and stakeholders” will collaborate in writing the tests. My experience is rather than a tool like Robot Framework is a very good fit for a QA/testers team that is distinct from dev and stakeholders. For such a team it makes sense to have a specific tool/DSL for testing rather than coding the functional/acceptance tests in the langage of the product.

Globally though the book is a good read, it fails at being a real “missing manual” compared to what the User Guide already offers. The book would maybe have benefit from taking an alternate approach with much more example, like a cookbook, and more experience from the field. Anyway, thanks to Sumit and Packt for the effort in sharing some knowledge about Robot Framework!

Agile Grenoble 2013

Last week I went to Agile Grenoble Conference. The whole day was of very good quality. I was lucky with my choice of sessions and shared my day between good discussions and great talks.

My menu was:
Kanban by Romain Couturier
Testing and refactoring legacy code by Sandro Mancuso
 Functional Programming by Neil Ford
 TDD by Michael Borde
 Angular + Jersey by Laurent Leseigneur and Olivier Cuenot

All of them were very interesting but I was really bluffed by Sandro’s performance.
His slides can be seen here (with video at the very last slide):

That is really the kind of session I am looking for:
1) just a couple of main messages (“testing from shortest branch, refactoring from deepest one) during 5 minutes
2) live coding with some best practices, tips and personal opinions
And this was also very motivating to become more fluent with an IDE as part of the performance was the advanced usage of Eclipse, which for a Java developer is a real add-on.

Before the keynote of the afternoon, organizers found a great way to read the whole 12 principles of the Agile manifesto to the full audience of the conference. Strangely enough, I think it was the first time I heard the 12 principles read totally during the conference after 5 editions. The idea was that every person in the room had received a cup with 3 sentences from the manifesto. When our sentences were read, we got to sit. After the 12, a group of 10 people remained standing and they had to go on stage to read the sentence they had on their cup. Those were fake sentences like “company result is the primary measure of progress”. Very clever game!

This year I was a full visitor: I was neither organizing nor presenting. So thanks to all the contributors of this great day and I hope to give a help one way or another next year!

Automation of Functional Tests with Robot Framework at SoftShake 2013

Last 24-25th october I went to SoftShake conference in Geneva. The conference was very interesting and was happy to see a lot of source code and live coding/demos. I was given the chance to make a presentation about automations of functional tests with Robot Framework. Here follows some feedback on it.

The slides can be found bellow though it misses what I consider being the most interesting part: live coding.  To show practical examples of code, I wrote some tests with Jenkins as a SUT. Those are very simple tests but that helped people to get a better idea of what kind of test can be written with Robot. Those little tests can be found in Github. I used fswatch to have the tests be executed every time I would save the tests. So with a split screen code+robot it was looking like an infinitest setup.

Questions I got after the presentations are worth noting as they give some information about what people care/think when they discuss tests automation:

1) Is it possible to have variables in the middle of a Robot Framework keyword? Question arose because in the Robot code I showed and wrote, I always write :

keyword argument1 argument2
ex/ file should exist in folder    file name    directory name

where in fact I should use the facility offered by Robot to put argument inside keywords like described in the documentation. This helps ending up with tests that are easier to read. Here is a simple example:

*** test cases ***
Embedding arguments into keyword name
number 2 and 2 should be equal

*** Keywords ***
number ${x} and ${y} should be equal
should be equal ${x} ${y}

2) “With a tool like Robot Framework, are QA supposed to commit the tests in the SCM?”. Answer is yes as the tool makes the more sense when integrated in a continuous integration environment that will retrieve the tests in an SCM. But the question is worth asking because in my previous company, having QA using the SCM was not an obvious step to make. With some non-technical rather-functional QA we might have a group that is more at ease with Office documents and filesystems than with developer tools. Personally, I consider using the same tool is also a very good opportunity to make the QA and Dev team be closer. (further reading on this topic: “Technical artifacts including test automation and manual regression test scripts (if any) belong in the Source Control System versioned with the associated code” by Elisabeth Hendrickson)

3) is it possible to write keywords in Java rather than Python. Answer is yes, although I consider Python to be a good choice and more homogenous with the syntax used in Robot DSL.

4) finally, there were several questions about what “component tests” are and what entry points could be used in the SUT to write such tests. My definition of component tests is rather shallow: everything that is between unit tests and end-2-end tests! That’s enough an explanation for developer-type people who can envision a REST API for example. That is more complicated to grasp for non-technical QA or managers. I was, once more, surprised to see that for many people they were 2 obvious way to test a product: unit tests written by developers (white box testing) and gui-driven-tests written by QA (black box testing)… Some more evangelism to do for gray box testing I guess!

So this was good opportunity to share my experience of Robot and to be challenged with unexpected questions is a very good way to progress. So I might be back with other sessions in the future…


Fall 2013 Conferences

A couple of conferences are coming up this fall.

First one is SoftShake in Geneva where I will be presenting a session on Tests Automation with Robot Framework. The program is very appealing and I expect to come back with some take aways. Looking forward for the cucumber session and also to meet some french people I have a chance to see only during conferences.

Second one is Agile Grenoble where the main problem will be to choose some sessions among the 9 tracks and the multiple interesting speakers that are lining up! But this is will be more relaxed for me as I won’t have my own session.

Hope to see you in one of these events!

Robot Framework and Excel

It can be useful to read Excel documents within test cases for two reasons : get some input for a test and check the output of a test when an Excel document is produced by the SUT. I propose to discuss quickly those 2 cases and see how easy it is to achieve it with Robot Framework.

The main reason I see for Excel document to be a good candidate for test cases input data is that Excel sheets are able to do computations (quite complicated ones in fact). In my previous job, the expected of our test cases were often some financial computation (derivate products, rates etc.) and the tool of choice for Product Management and QA team to compute the expected of different use cases was Excel. When we chose to automate those examples, we basically copy/pasted the results from Excel to our testing tool. Until one day we thought it would be even more convenient to read the Excel file directly from our testing tool. To be honest, the idea was stolen from a demo of a tester building a data-driven tests framework based on Quality Center and Excel (yes, I know…)

The other side of the coin is when the SUT is producing Excel documents that we want to check. In that case, the expected could be stored in our tests, or it could be another XLS file (and we could compare results found in both).

So, here is some Robot Framework code that you could use as a start:

*** Settings ***
library  openpyxl.reader.excel
 
*** variables ***
${expected_value}  expected result
 
*** test cases ***
Excel sheet
    ${wb} = load_workbook sample.xlsx
    ${ws} = set variable ${wb.get_active_sheet()}
    ${cell} = set variable ${ws.cell('A1')}
    ${actual_value} =  set variable ${cell.value}
    should be equal  ${expected_value}  ${actual_value}

Here I open the document sample.xlsx and check that the value in the first cell match a value that I stored in a variable. I am using the openpyxl library (warning : can read only XLSdocuments). This is, IMHO, quite compact and simple code. From there, you can write your own keyword to parse the document according to your needs.

Some final thoughts :

  1. Robot Framework text format for test suites/cases is great as it fits perfectly in SCM. And this is where we want to store our tests artifacts (quote from a great article from Elisabeth Hendrickson : “Technical artifacts including test automation and manual regression test scripts belong in the Source Control System versioned with the associated code”). Unfortunately, Excel document (even in the XLSX format, which is XML… but zipped!) are binary files and if we store them in SCM, we won’t be able to compare different versions. That’s a major limit to their use.
  2. as I swim in the open source world all day long, I could have come up with a post about how to read some files that have a more open format than XLS…. The thing is that sometimes we don’t have the choice of the tools (example, customers are asking for export as XLSX in my product, I will have to test it one way or another) and that is the tool with which I had the experience I wanted to share.
  3. It is interesting to see that this Excel topic is discussed for many testing tools. Some are reading Excel from Junit, some other from Cucumber and there was a proposition to include it by default in Robot Framework.

Oh and thanks to Jean-Charles and Matthieu for the testing dojo in which we came up with this little snippet of code !

Robot Framework, Selenium, Jenkins, and XVFB

Until recently, my test cases written with Robot Framework were not driven by the GUI. Those tests were interacting with the SUT using many different ways: process library, database access, file system, REST requests etc. Those access usually don’t change too often during the lifetime of a product as they often become a contract for users/tools communicating with product (i.e. API). Whereas driving the SUT through the UI can be brittle and engage the team in a constant refactoring of the tests. This is summarized in the famous pyramid of tests. But, having no automated GUI tests, my pyramid was headless! So I decided to invest a bit in the topic.

From there I had the choice between :

  • writing tc with Robot using the Robot Framework Selenium 2 library
    pro: integrated with other existing Robot tc + easy to start
    con: library a bit behind the official one + selenium users are mostly not using this API
  • writing tc in Java using the Selenium 2 Java binding
    pro: up to date + large community of users
    con: another set of tools to write/launch/report test cases in addition to Robot

I took the easy path and went for the Robot Library. There is an excellent demo of the library which helps to start-up. Before digging into the tests of my SUT, I added another 2 steps:

  1. going a bit further in my knowledge of Chrome Developer Tool. There is an excellent online course by Code School. Those tools are soon becoming very useful when creating GUI driven test case. Note that, Firefox dev console seems to offer the same service, but somehow I feel more ease with Chrome ones.
  2. running a testing dojo with a group of peers. We used Jenkins as SUT (as I already did to perform some stress test trials) and it worked quite well although Jenkins does not seem to be the easiest web app to test as we had to use XPATH to locate element which can become obsolete quite fast.

I was then able to create my first tests on the SUT I am testing. Those were more easy as expected as all the element I had to address had unique IDs! The biggest obstacle is to chain actions without using the horrible sleep keyword (see Martin again). With the Robot Selenium library, the easiest way is to use (and abuse) the “wait until page contains element” keyword.

Last but not least, I needed to launch the tests using Jenkins (very easy and quite nice with the plugin) on a linux VM…. without a display! Here enters PhantomJS that is a headless browser supported by the Robot Selenium library. But somehow, my tests were randomly failing with it, so I gave it up and went back to Firefox. And here is the last character of this little story: xvfb. This display server sends the graphic to memory so no need to have a full/real display available. The install is not immediate but some shared their feedback on it so it is quite smooth after all.

So the current configuration  of my Robot Selenium tc in Jenkins is:

  • xvfb running on the VM on which tests are going sending display to :89
  • in Jenkins, in my Robot task, in “Build Environment / Set environment variable” I put “DISPLAY=:89”

And that’s it, tests are running OK on this VM. And on the top of that, when there is a failure in the tests, the Robot Selenium lib is able to perform a screenshot and save it to disk to ease analysis of the issue!

Improve the performance of your automated tests

If you google “performance of automated tests”, you will get loads of articles about “automated performance tests” but very few about how to speed-up the execution of your test portfolio. Although this is one of the goals of a test suite: it should give a quick feedback. Of course we don’t expect the same performance for unit tests (measured in seconds or minutes) than for larger system tests (measured in dozens of minutes to several hours probably). But at any layer of the test pyramid, having faster tests is an advantage.

Here is a collection of ways to enhance the performance of the automated tests:

1) Execute Tests in Parallel
If the tests are independent (as they should be), you could split your test portfolio in pieces and run the different parts in parallel. You can start on the machine on which your tests are already running as it probably has a multi-core processor that could run different “testing threads” in parallel. In that case, beware to customize each install/set-up so that the different instances of your products don’t step on each other foot. You can also send the execution to several machines in your lab. Here are a couple of articles related to this topic:
– Pivotal Labs on how to parallelize RSpec tests
– Java.net blog post on how to parallelize JUnit tests
– How to distribute Selenium tests on multiple machine with Selenium Grid

2) Avoid Sleep
On the higher levels of the testing pyramid, we are testing user scenarios and our scripts might need some pauses in order to run successfully. For example, on the filesystem level, we could have to wait for a log file to be created before checking its content. On the UI level, we might need to wait for a button to be here to click it. An easy way to cope with this is to add sleep() all over the tests scripts until they pass. That, of course, should be avoided as much as possible. First reason is because it makes the tests brittle: when we will run the test on a slower machine the test might fail. Another reason is that pilling up those sleep() will make the test very slow. So we should use any kind of wait() instead that would regularly check for an object/event to be there. Here is how to do it in Selenium and Robot Framework:
– Presentation of WebDriverWait by Mozilla
– Wait until keyword succeeds in Robot Framework

3) Share Setup and Teardown
“Every test case should be independent” does not mean that every test case should handle a full setup and a full teardown. A good pattern is to share the setup and teardown on different levels to enhance the performance of the portfolio. For example, we could have a global setup that deploy a MySQL database that some tests will use later on. We could have another shared setup for a group of a dozen of test cases that add some lines in a table of that database. Finally each test case will finish its own setup by tweaking the database again before doing the test itself. The trick is to share the setup among a group of test cases that won’t modify what the setup configured! This is very convenient and easy to do with Robot Framework and with JUnit.

4) Focus your Optimization Effort
Another way to look at the test performance issue could be to start by identifying the tests or the functions/methods/keywords that are the more time consuming over your whole portfolio. Focussing your effort on those parts could lead to quick wins. Here are two examples:
– My humble code to measure most expensive keywords in a Robot Framework test suite
– A smart XSL on Stackoverflow to to identify the longest running unit tests on Junit

Hope this might help some,
and don’t hesitate to post a comment with other ideas/links!

EDIT : found some slides from David Gageot on the very same topic  : http://fr.slideshare.net/dgageot/lets-make-this-test-suite-run-faster-softshake-2010

Getting started with Gatling for stress test

I was looking for a stress tool to test a java product via its HTTP API.
Gatling was in my “to try list” for a couple of reasons:

I gave it a try and my first impressions were very good.
The wiki has a very good “getting started” and “first steps” sections with useful examples.
I propose here to show an alternate set of “first steps” by stress-testing Jenkins.

Here are my steps (on a Mac Book Pro with os x 10.8.3)

1) installation and configuration of jenkins

I discovered there is a one click install of Jenkins for MacOsX.
http://jenkins-ci.org/content/thank-you-downloading-os-x-installer
Jenkins is automatically launched and ready to be used.
Server can be accessed over HTTP on: http://localhost:8080/
I created a fake job that does nothing and launched it a couple of time to have some history:

01_job_jenkins

2) installation of Gatling

I chose to download the 1.5.1 instead of the 2.0 as this last one is still under development and because 1.5.1 seems to have the feature I need.
I followed the “getting started” wiki page
Basically the installation and configuration was, here again, very quick:

  • unzip
  • launch 3 shell command :

    sudo sysctl -w kern.maxfilesperproc=200000
    sudo sysctl -w kern.maxfiles=200000
    sudo sysctl -w net.inet.ip.portrange.first=1024

and that’s it!

3) preparation of the simulation

For our test of jenkins, we will use the recorder to write the simulation script.
The recorder will allow us to create a script that mimick what users could do on Jenkins.
For this simple example, we will just click on the job, click on a build and click on “console output” for this build.

First, we set-up Gatling’s recorder:

02_recorder

Now that Gatling recorder is ready :

This creates a scala script in /path/to/gatling/user-files/simulations/Jenkins
You can take a look a the generated code (I added some comments in the file)

4) stress testing jenkins

If we launch the script as it, we will simulate the connection of a single user.
The reports gives a global view of the result of the test with the stats for the 22 requests performed.

03_result_1_user

To see what happens when 500 users connect simultaneously on my server, I just have to change the last part of the script to:

setUp(scn.users(500).protocolConfig(httpConf))

The result shows that half of the request1 performed failed (260 out of 240).

04_result_500_users

Failures are caused because Gatling will consider a request times out after 60 seconds.
Note that this timeout is defined in path/to/gatling/conf/gatling/conf

To be a little more realistic, we can simulate the fact that all the users are connecting gradually during 1 minutes (the whole 100 people of the R&D are checking the console output of the main job from 8h00 to 8h01 in the morning for example !). This can be scripted like that:

setUp(scn.users(500).ramp(60).protocolConfig(httpConf))

In that case, only 20 requests failed and other parts of the reports are interesting to look at.

  • Number of active active sessions:

05_number_of_sessions

=> we can see the growth during 1 minute and gradual shutdown

  • Number of requests per seconds

06_number_requests_per_sec

=> we can see that the 20 requests that fails are in the middle of the simulation when we reach the maximum number of active sessions

5) conclusion

This test is not very realistic for many reasons like:

  • there is no network involved as I do everything on my laptop
  • Jenkins user will retrieve bigger content on jenkins and have different behaviors

Yet, it is a good start and quite easy to perform.
Next steps would use more advanced features of Gatling.

Would you have any questions or experience to share, don’t hesitate to contact me.
If I have more to share on the topic, expect a follow-up.