Robotics with mBot #4

Follow-up of my previous articles (firstsecond, and third) about my experience hosting a robotic class in a junior high school. Here is a little wrap-up of the fourth session.

Open Theme

For this session, I opened the activities in different directions by proposing new hardware to play with (remote control and led matrix) and leaving the groups full choices on what they wanted to program. The deal was let them build/program whatever they wanted and show it to the other groups at the end of next session. So this session was the first part of a double session.

Remote Controls

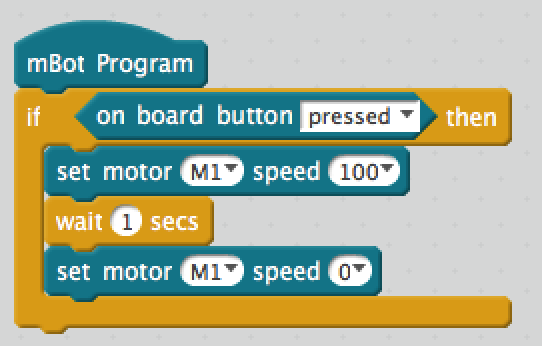
Kids have been asking to get the remote controls since the first session. I kept them until today because I was afraid that the class would quickly turn wild with kids driving their robot all around the room. Of course, that’s pretty much what happened! The first thing they had to do to use the remote control was to reset the program on the board to default one so that they could use the arrow to drive the robot. Then I told them they could reprogram each key of the remote. That caught their attention and most of the group seemed to enjoy triggering things with the remote (nicer than triggering by pushing the on-board button).

Led Matrix

Fixing the Led Matrix on the Robot was fun for all the groups because it was an opportunity to use again the screwdriver! Almost to quick and easy to do, but fun anyway. They the “draw on led matrix” action was very successful because it allows to draw your own custom image on the matrix. This feature is similar to the “draw sprite”one in Scratch using the Paint Editor.

Combo

Using both the remote control and the led matrix, several groups ended up this session with program showing different drawings on the matrix depending on the key pressed on the remote. Let’s see what they come up at the end of the next session.



Robotics with mBot #3

Follow-up of my previous articles (first and second) about my experience hosting a robotic class in a junior high school. Here is a little wrap-up of the third session.

Good session

This session was a bit more successful than previous one I think. This time I assigned them a broad goal of “playing around” with the motored wheels of the robot (which is what they wanted to do from day 1!). I could not resist preparing a single sheet of paper with some instructions on the different steps they could follow that I gave to each group. For example the first steps were:

  • go straight for 1 second
  • go straight for 1 second and then back for 1 second
  • go around the foot of your chair with the Robot
  • start playing around with the ultra-sound sensor…

Most of the kids followed this guidance and were able to reach some satisfying results. Important to note that although the group was only made of 12 people, it was of great help that I came with a colleague to help me manage the session!  An interesting lesson from this session is the common programming mistakes kids did.

No Looping

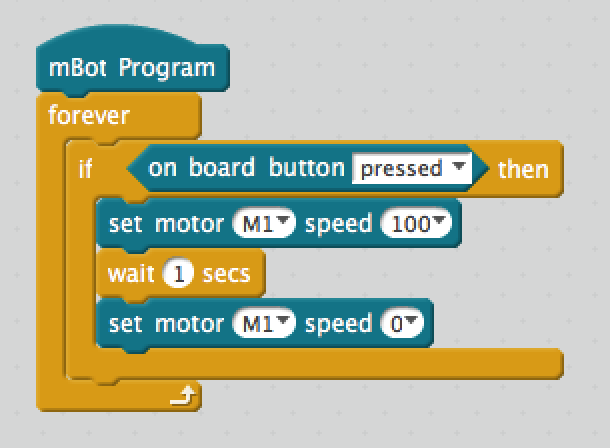
The most typical error is to write an event-driven program without an event-waiting loop :

So here, the resulting program does…. nothing! The “if” is done immediately (and most probably the button is not yet pressed), and then it’s over. The solution is to surround the “if” with a “forever” loop:

This error is sort of satisfying at first because it allows to explain the whole “computer is dumb and only do what you ask it to”, but it’s a bit untrue to say that nowadays to a young programmer because, well, computer is super smart is does A LOT for us. We just have to assemble colored bricks to have a robot move, so why this “forever” loop should not be included in all this framework? The “computer does only what you tell it to do” sounds true only for those who did some assembly language…

No Waiting

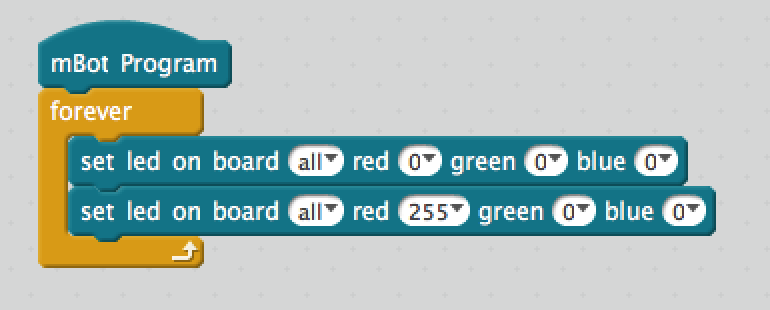
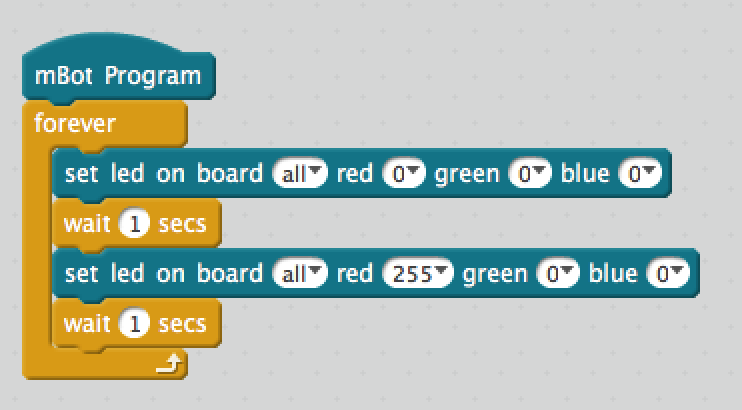
The second most typical error is to write an series of statement that are changing the state of the machine, but without waiting between each statement:

Here the user might expect to see blinking led, but they won’t see it because the program will execute too quickly for a human to see it. So here the solution is to add some wait command between each change of state:

Once the kids had those 2 fundamental rules in mind (looping and waiting), they were able to make some good progress!

Robotics with mBot #2

Follow-up of my previous article about my experience hosting a robotic class in a junior high school. Here is a little wrap-up of the second session.

Preparation

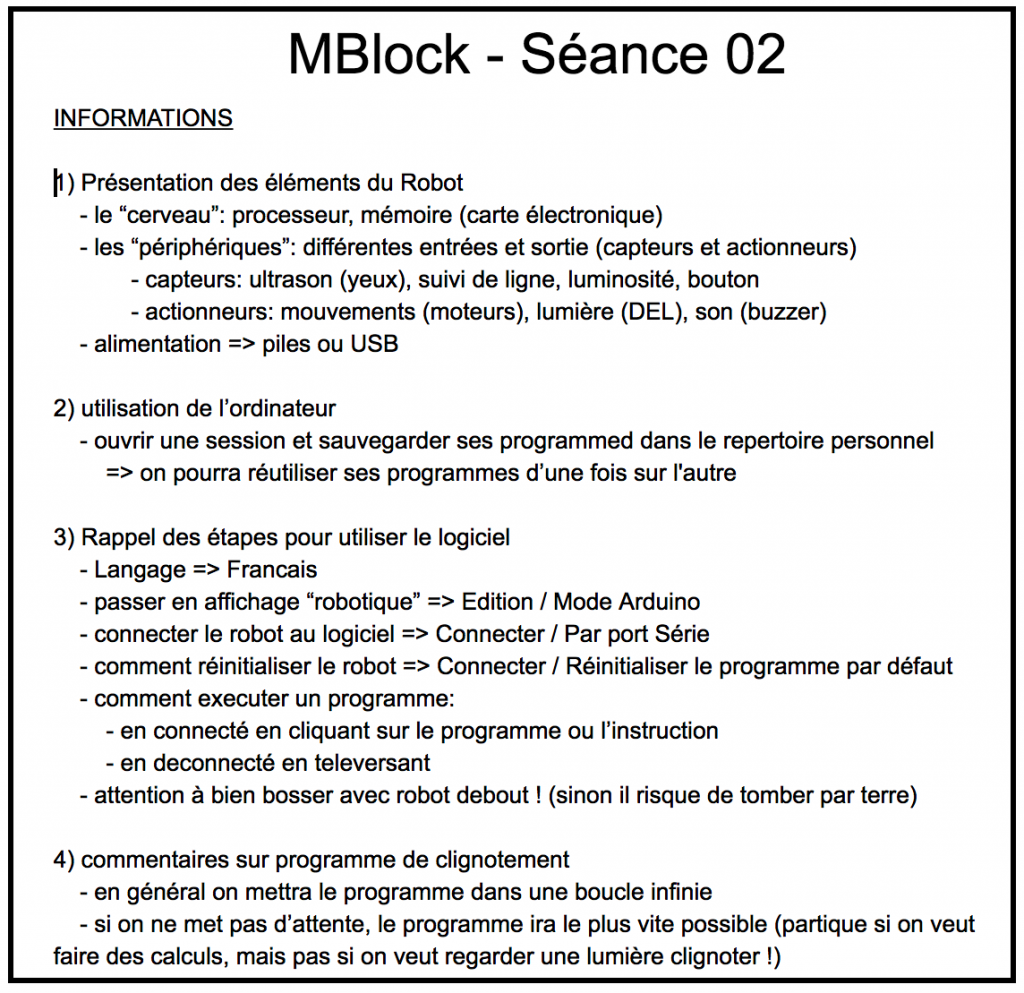
When I was preparing this second session, I started to write a little memo of the things I wanted to share (a mix of a recap of last session and theoretical introduction!) and some exercise ideas (and proposal of solutions). So I came up with this mini-lesson :

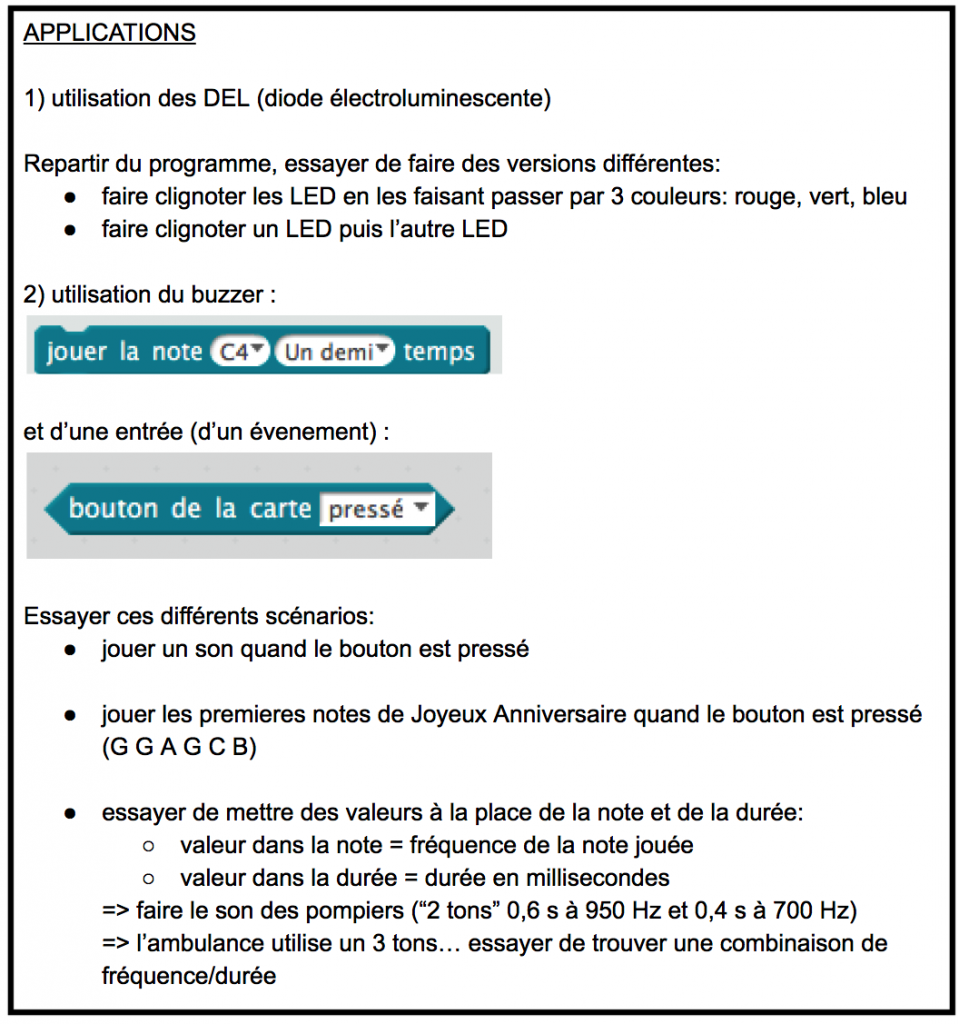
and this list of mini-project ideas:

I printed a dozen copies and came to the class with my stack (and some pride!). I probably dared to picture a group of 12 kids reading the document while nodding in approval and then getting on their machine to execute some of my proposals…

Execution

Of course this scenario did not happen at all! The attendees were very excited to see their little robot again (after 2 weeks break) so all they wanted to do was start tinkering with them! After 1 minute most of them were already starting to program and not paying any attention to my little speech about what are the robot “inputs” and “outputs”. So I tried to be as concise as possible and essentially gave up with a “ok, go ahead and enjoy”.

Lesson

Obviously the top-down approach I came up with was not the right one. The essence of this sort of class is to give some tools to a group and let them play, discover, assemble, dissemble etc. That’s quite demanding for the host though because everybody will react differently and answering to their unique/unexpected requests (I am trying to do X and have this problem) will be more complicated than just giving hints for a problem that was asked to the whole group.

Question

Main question I am fighting with about this all pedagogy topic is if I should hope to reach some milestone in term of knowledge or achievement where I could stop and say “ok, now we’ve understood, as a group, the concept of variables/loops/whatever”. Probably not needed.

Robotics with mBot #1

This year, I volunteered to lead a robotic class in the local high school. I will share some bits of this experience in here. Maybe someday that will help someone going through similar project!

Context

Junior High schools in France are for “kids” from 11 to 14. They do have some classes about computer usage and programming. In this school, Scratch is used by teachers to show programming concepts. Some extra-curriculum activities are offered as well, among which a robotic class was started last year. The initiator of this class chose to work with mBot robots. So I am continuing this class, on a 1 hour every 2 weeks rythme for the whole school year.

Settings

I host the class during lunch break with 12 kids organised in 6 pairs. Each pair is sitting behind a large-enough table (so they can have some room to manipulate the robot) and they have a Windows PC with mBlock installed. They can save their work on their private network folder to start from there on next class.

Robots

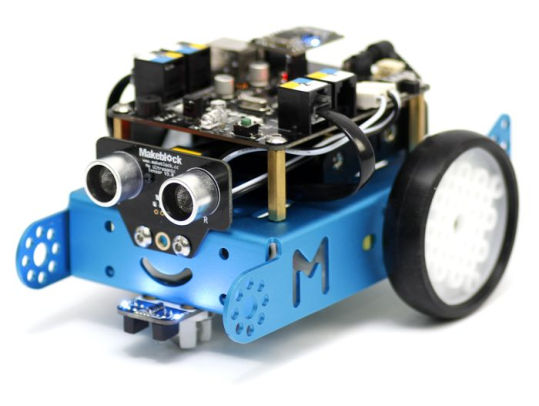
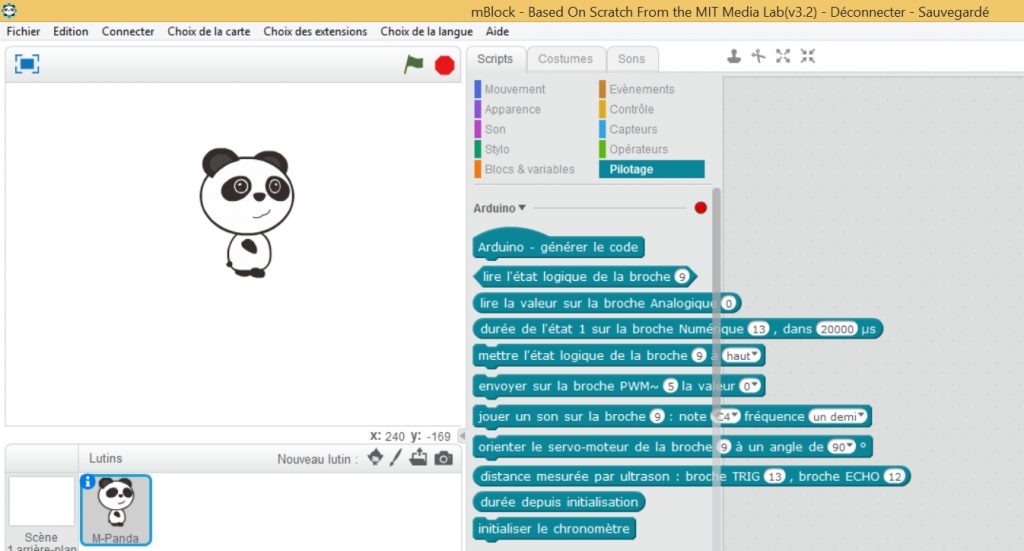
So I did not choose the mBots and can’t share all the motivations for this choice. But one thing quite handy with those robots is that the programming tool associated with them (mBlock) is a fork of scratch. So for kids who used Scratch before, this is perfect. In addition, the robots seem to be reliable and robust. For our class we have 6 robots, so one per pair of kids. We decided to stick with the USB connection between PC and robots: more reliable than bluetooth and WiFi connections from our tests.

Session #1

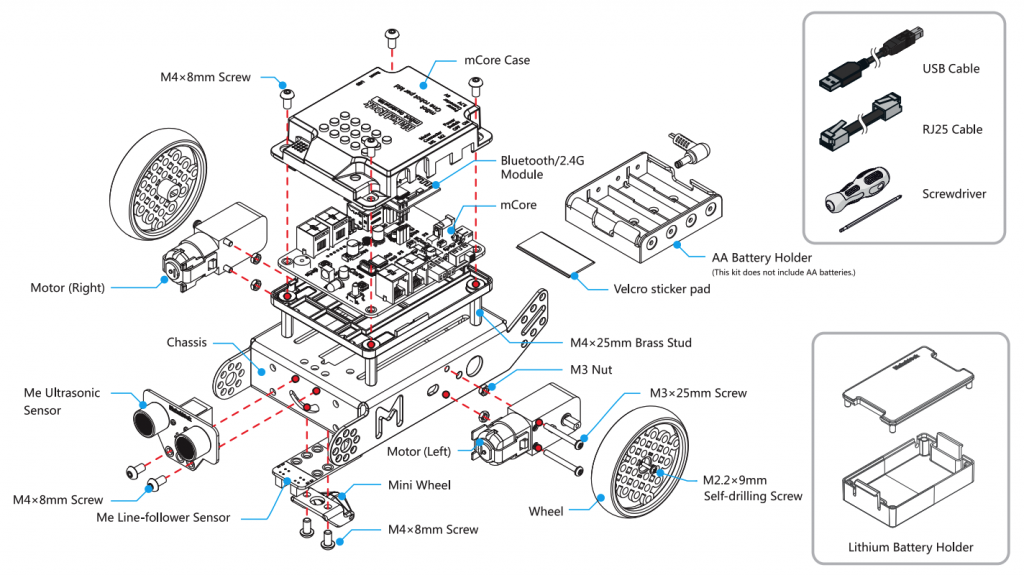
For the first session, I was helped by the initiator of the project. The robots were already mounted but we decided to completely disassemble them and present them to the kids as if they were just acquired. This way, the first session was started with the mounting the robots (following the user guide). This was way smoother than expected and most groups finished in 20/30 minutes and were able to start connecting the robot to the PC and coding before the end of the class. I had found (and printed) a couple of examples of programs (that were recently added on the mblock site) that I gave them so that they could kick off some little projects and see some LED blinking or hear some buzzer buzzing.

Take aways

  • No surprise here, but kids are not shy with technology! The group was made of volunteer, so not at all a representative sample of the school population, but it was still surprising to see them mounting, plugging and clicking without any sort of restraint.
  • Screwdrivers are delivered in the mBot box. Kids are happy to use them to mount the robot. Though once they get too excited, some of them tend to use them as swords to combat other kid. Advice: take back the screwdrivers once they don’t need them anymore :-)
  • Most of the kids have no idea what an RJ45 socket is… Wifi-generation! I had to show to some groups how to insert it the right way, and how to push the little ear to remove it!
  • To share some important messages/information to the group, the only moment seem to be the beginning of the session. Later they are all in the middle of something and it’s difficult to get everyone attention. And at the end of the class, they just disappear like a flock of bird!